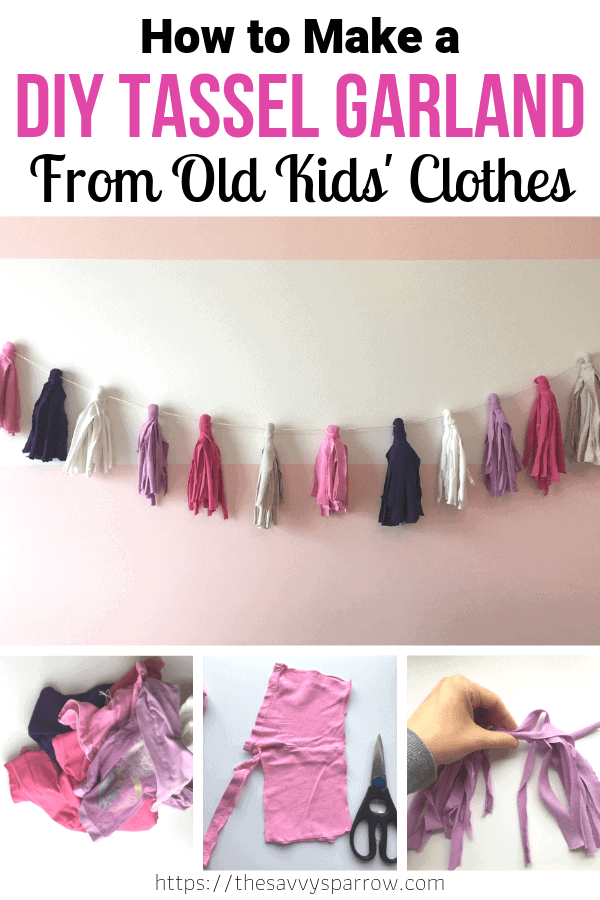
DIY Tassel Garland The utilization of Worn Kids’ Attire
In command for you a straightforward plan to repurpose aged teenagers’ apparel, then this DIY material tassel garland is the appropriate DIY mission for you! Learn to electrify a tassel garland with material, and flip your teenagers’ outgrown apparel into a adorable and sentimental garland to hang in their bedrooms!
UPDATED: June 4, 2020
I occupy two teenagers.
And I additionally occupy a BOATLOAD of apparel that they’ve outgrown.
And I additionally occupy a runt Pinterest obsession.
Put apart all that collectively and you procure this straight forward DIY mission using repurposed teenagers’ apparel…
I had been longing to spoil a DIY Tassel Garland… I in finding the general qualified, brilliant tassels striking neatly in a row in Pinterest photography. Nonetheless then I click on on the links and gape on the designate! In actuality?! You desire me to pay $59 for this?
So, naturally I became as soon as resolute to determine how to electrify my hang DIY Tassel Garland using something that I had PLENTY of… aged teenagers’ apparel.
Whenever you’ve bought a ton of aged apparel laying around too, then right here’s how to flip them into substantial adorable DIY Tassel Garlands:
Offers Wanted for DIY Tassel Garlands
You’ve perchance already bought the general supplies that you just would also occupy got to electrify these adorable garlands. Right here’s the provision checklist:
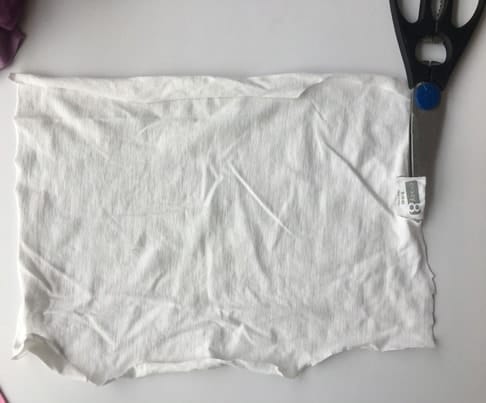
Worn Attire or Varied Fabric
I rounded up aged shirts, leggings, and shorts in a vary of colours to ascertain the color blueprint in my youngest daughter’s room. I’ll assist you flip every apparel form into adorable tassels!
Fabric Scissors
I the truth is aged my husband’s kitchen shears for this mission (Sorry, Hubby!), on fable of I couldn’t score my material scissors. Nonetheless I don’t point out that. 🙂
Baker’s Twine
Another kitchen staple, baker’s twine, served as the appropriate neutral and sturdy string for striking my DIY Fabric Tassel Garland.
I’d most productive point out using butcher’s twine that is supposed for cooking. Whenever you spoil an Amazon test for butcher’s twine it brings up a bunch of adorable coloured twines additionally, however for my fragment, they don’t seem like sturdy sufficient for this mission.
Sizzling Glue Gun and Glue Sticks
And that’s it!
After you’ve bought your supplies collectively, it’s time to originate making your tassels.
Need extra methods to use aged teenagers’ apparel? Click right here for 12 Issues to Enact with Worn Kids Attire!
The appropriate plan to Make a DIY Fabric Tassel Garland using Worn Attire
1. Acquire Worn Attire.

Acquire up aged apparel in the colours or patterns that you just the truth is desire for your completed garland.
I aged one pair of shorts, three pairs of leggings, and two lengthy-sleeve shirts for mine, however you would also without issues use fewer pieces of apparel. Or, in command so that you just can electrify this straight forward material tassel garland using material scraps, then you definately may well presumably presumably also skip on the general model down to step 4.
2. Reduce on aspect seams for shorts or pants.
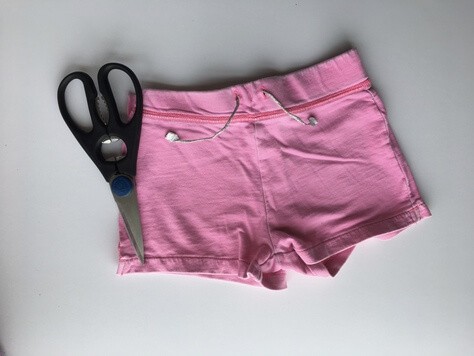
Spoil up left aspect seam, from high to bottom. Repeat on lawful aspect seam. It is most likely you’ll presumably presumably also mute then occupy one fragment of the front aspect of the shorts and one encourage fragment.
*Whenever you don’t occupy shorts to repurpose, then don’t trouble! You would affect this straight forward DIY tassel garland using shirts additionally… I’ll level to you the plan down below!
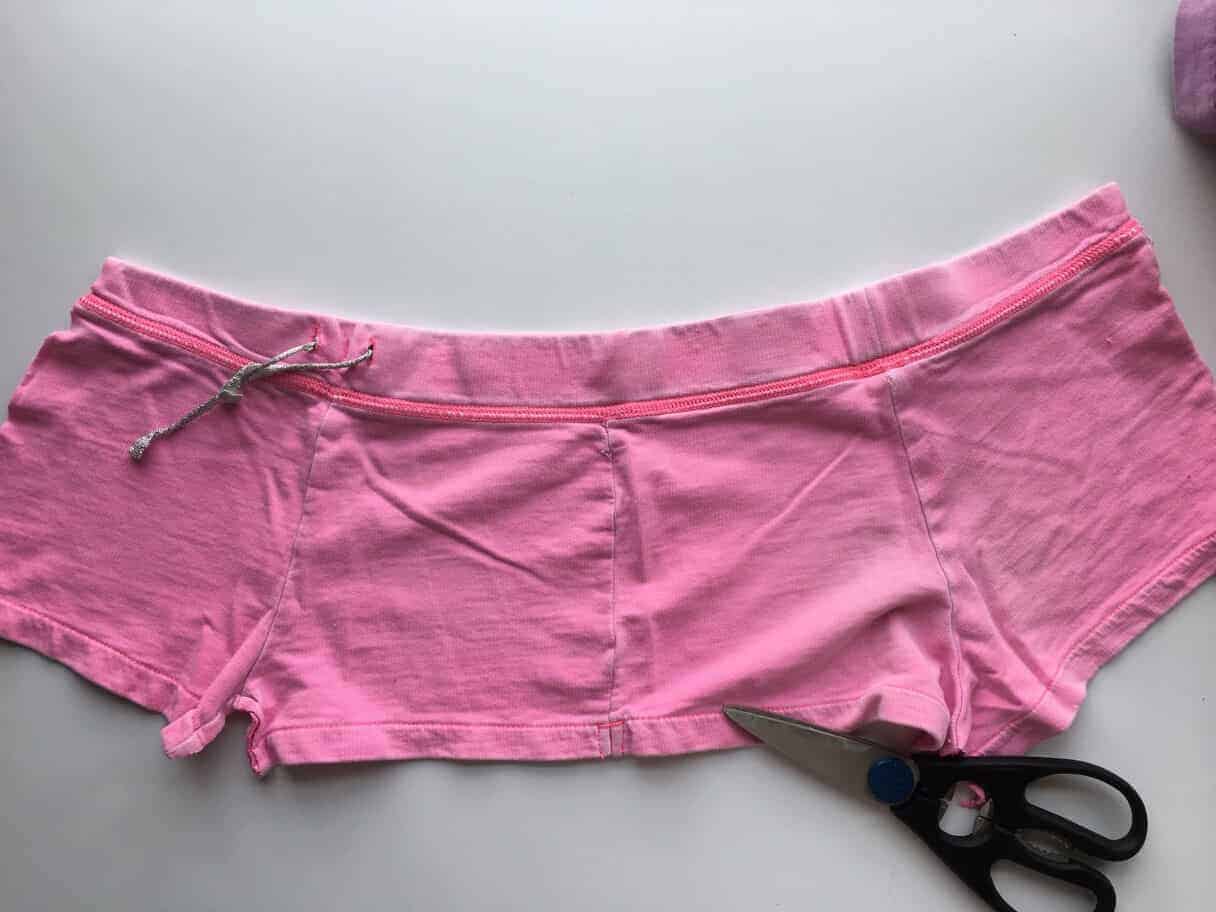
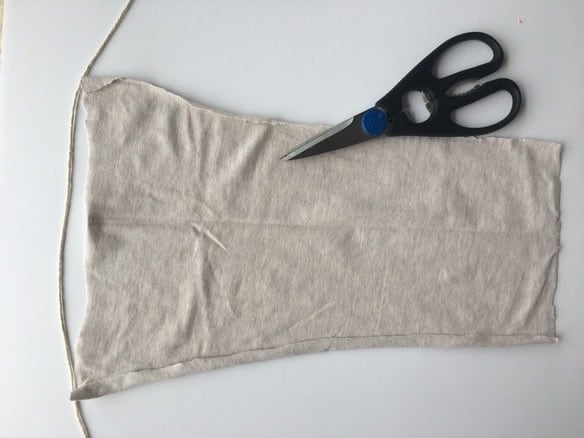
3. Reduce out the waist band, leg hems, and aspect seams of your shorts, saving them for later.
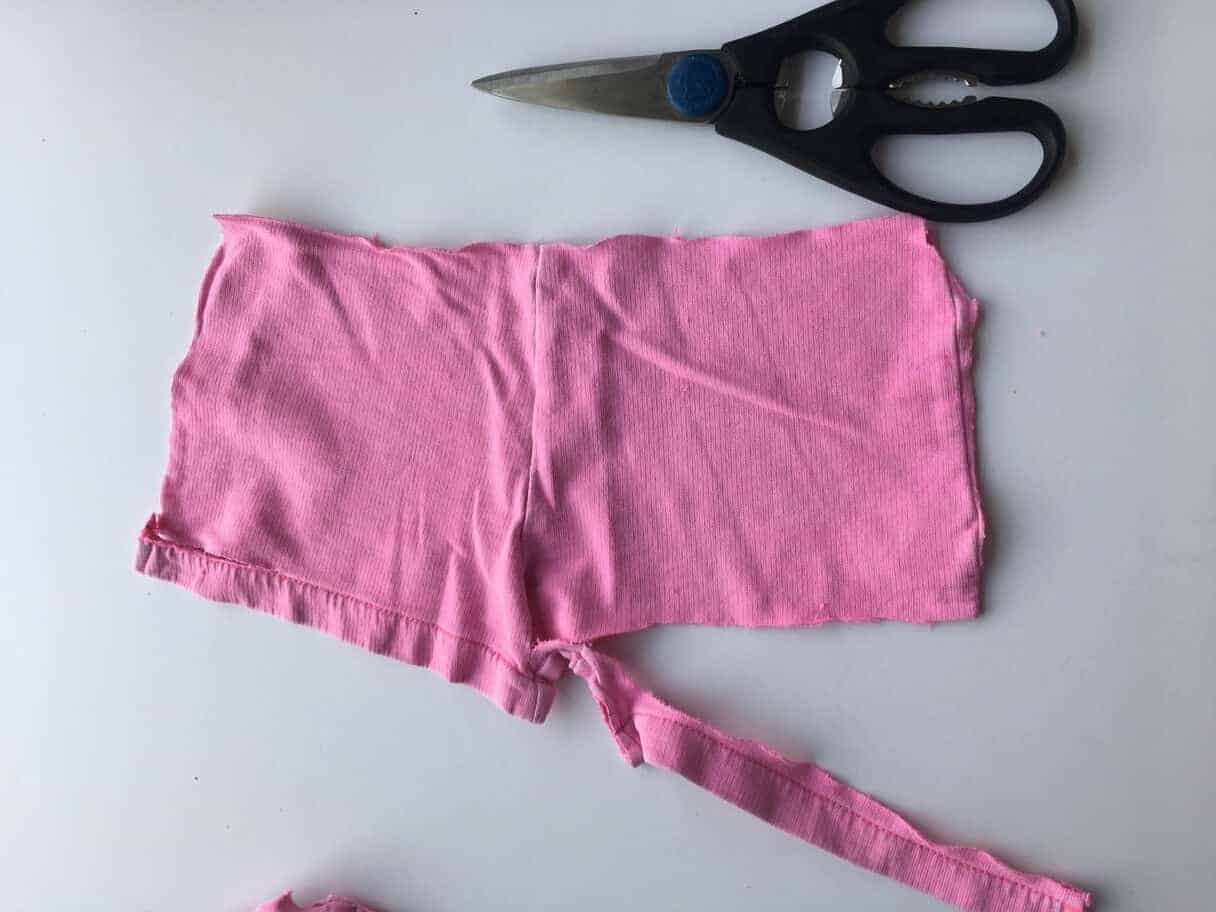
Strive to be left with a solid fragment of material with most productive the front and encourage center seams. Now you’re prepared to originate reducing your tassels!
4. Reduce strips for your material tassels.
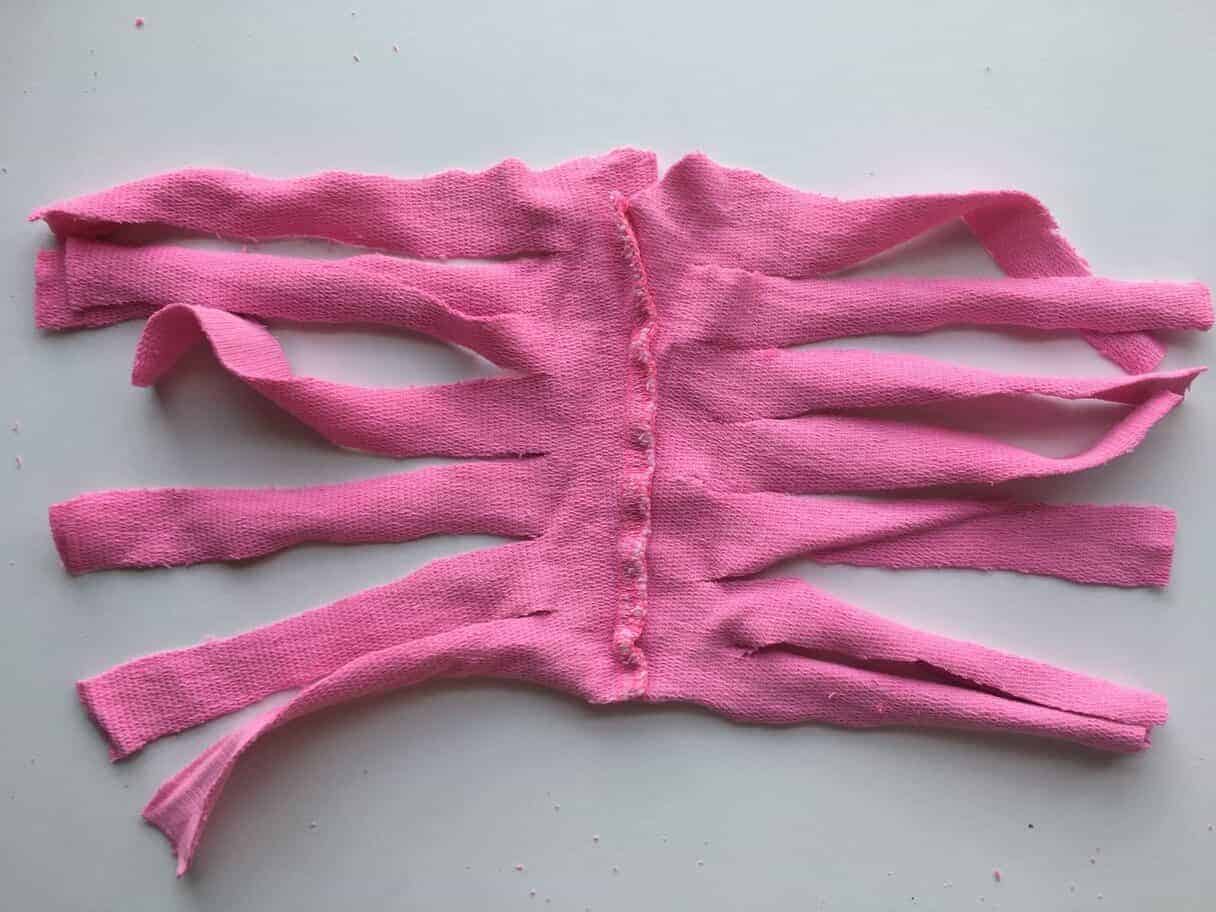
Reduce lengthy strips of material about 1/2″ to three/4″ large on both aspect of the seam, leaving about 1 1/2″ to 2″ of uncut material in the center. This is what your material may well presumably presumably also mute gape cherish can occupy to you are completed reducing.
*This submit contains affiliate links, which implies can occupy to you click on a link and affect a protect, I blueprint a rate at no extra designate to you. Learn my corpulent disclosure right here.
Exercise to Obtain in wish to DIY? Compare out these substantial adorable material tassel garlands (affiliate)!
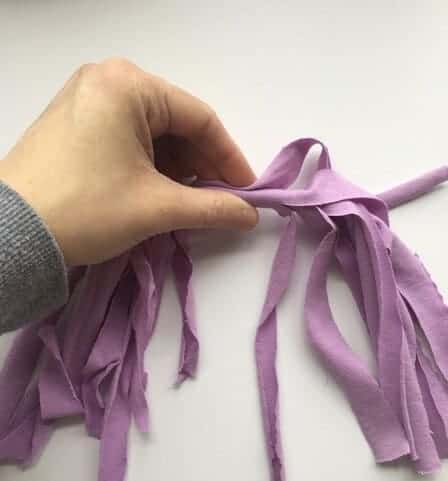
5. Form the tassels for your DIY Tassel Garland.
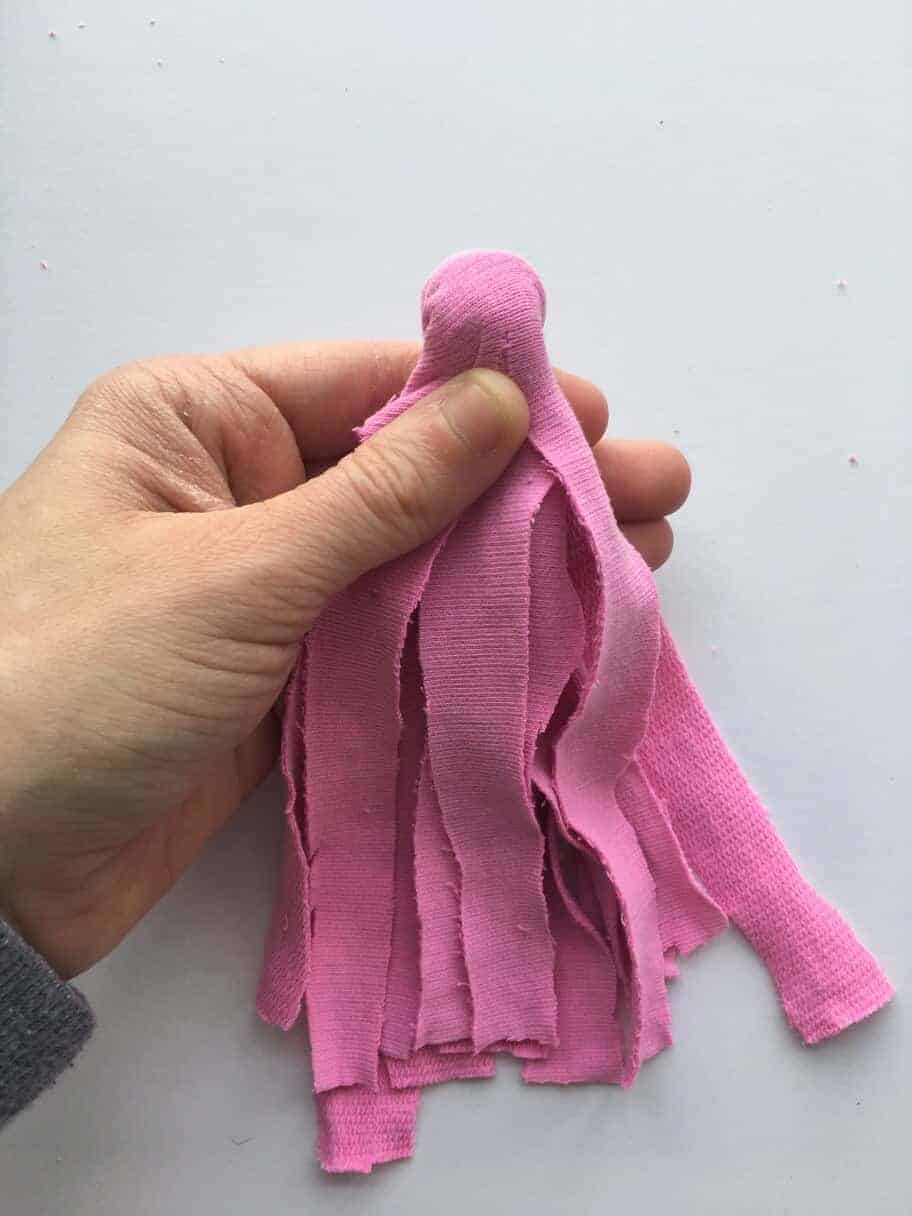
Beginning on the bottom center, roll material tightly. Then fold in half of so as that your tassel looks cherish this.
6. Tie the tip of your tassel around your garland using twine.
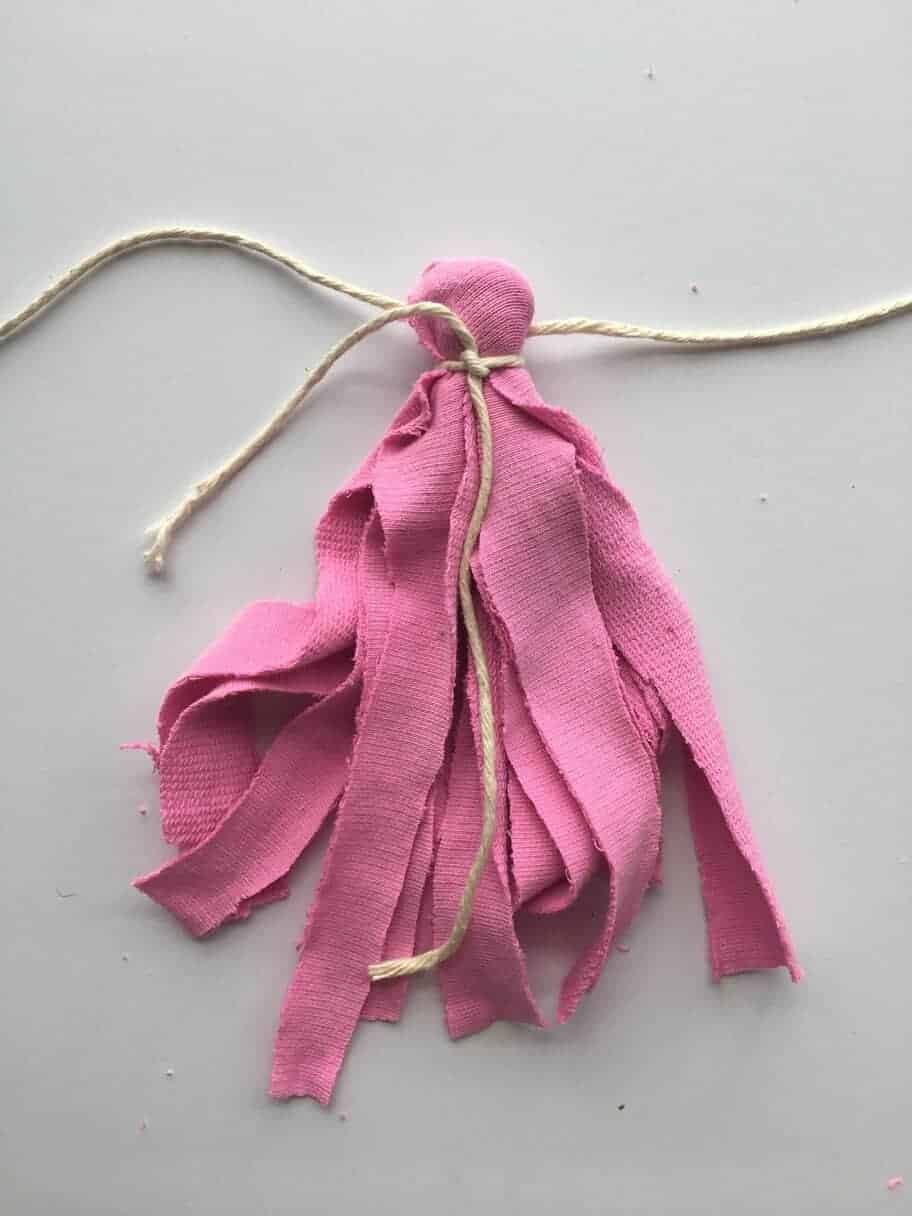
Reduce baker’s twine to the scale that you just the truth is desire your completed garland.
Fold your first tassel over the baker’s twine. The utilization of one other fragment of baker’s twine about 6″ lengthy, tie a tight double knot across the folded tassel about 3/4″ from the tip.
You now occupy your first tassel linked to your garland! Don’t trouble about the lengthy pieces of twine striking down from your tassel – we’ll kind out that later.
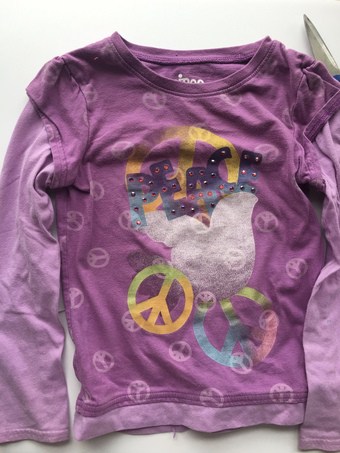
7. Reduce alongside all seams to repurpose shirts into tassels.
You would use the sleeves or the bodice fragment of the shirt. I aged both for my garland. The white one is a lengthy-sleeve shirt from Crazy8.
Reduce alongside all seams till you are left with staunch the front or encourage solid fragment of your shirt. I aged the encourage of the shirt, and saved the adorable gold star on the front of the shirt for one other DIY craft mission.
The gentle red tassels from my garland are from the sleeves of this shirt. Reduce the sleeves off on the shoulder, and then split the seam of the sleeve till you would also occupy got one lengthy, flat fragment of material. But again, ensure that to assign the seam pieces for later.
8. Repeat steps 4-6.
After you’ve prepped the cloth from your aged shirts, proceed making your tassels by reducing thin strips of material, rolling the tassels, folding them in half of over your garland twine fragment, and tying closed.
9. Flip your leggings into material tassels.
Reduce legs off of leggings on the thigh spot, then slash hem off of leg. Reduce straight up seam of leg from high to bottom. Return and procure complete seam from the fragment of material, holding it intact to use later.
Whenever you would also occupy got a solid fragment of material, repeat steps 4-6.

10. Cloak the baker’s twine ties.
As soon as your complete tassels are linked to your DIY Tassel Garland, tidy all extra baker’s twine from the “neck” of your tassels. Then, use sizzling glue gun to quilt baker’s twine tie with seam pieces in coordinating colours.
Whenever you gape closely in the photo above, you would also in finding that I’ve glued the strip of material with the sewn seam across the tip of the tassels, overlaying up the baker’s twine.
11. Natty your tassels
At this level your material tassels it could perchance be heaps of lengths on fable of about a of them were made with shirts and some were made of pants. Good give every tassel just a cramped “haircut” so as that every tassel is the the same size.
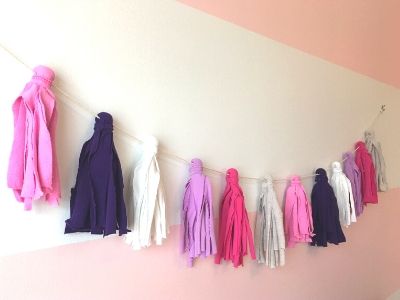
12. Hang your material tassel garland on your cramped one’s bed room or use for occasion decor!
To hang your DIY tassel garland, simply tie every kill of the butcher’s twine to a image hanger and nail into the wall. Or, you would also additionally hang your original garland using say hooks to lower difficulty to your partitions.
This substantial adorable tassel garland is ultimate to hang on the wall of your cramped lady’s room, to brighten a occasion table, or to hang across your mantle! And, it will most likely presumably presumably perchance be adorable with patterned materials additionally.
Whenever you affect your hang, I’d recognize to review a photograph! Mark me on Fb or Instagram, or leave me a observation down below letting me know the plan your garland grew to become out!
And don’t omit my BEST pointers for decorating your teenagers’ dinky bedrooms, and why my daughter’s Zipper Bedding is my ABSOLUTE favourite thing in her room!
Love this DIY Tassel Garland goodness?! Share the recognize and pin me!
DIY Tassel Garland The utilization of Worn Kids’ Attire


Yorumlar
Yorum Gönder