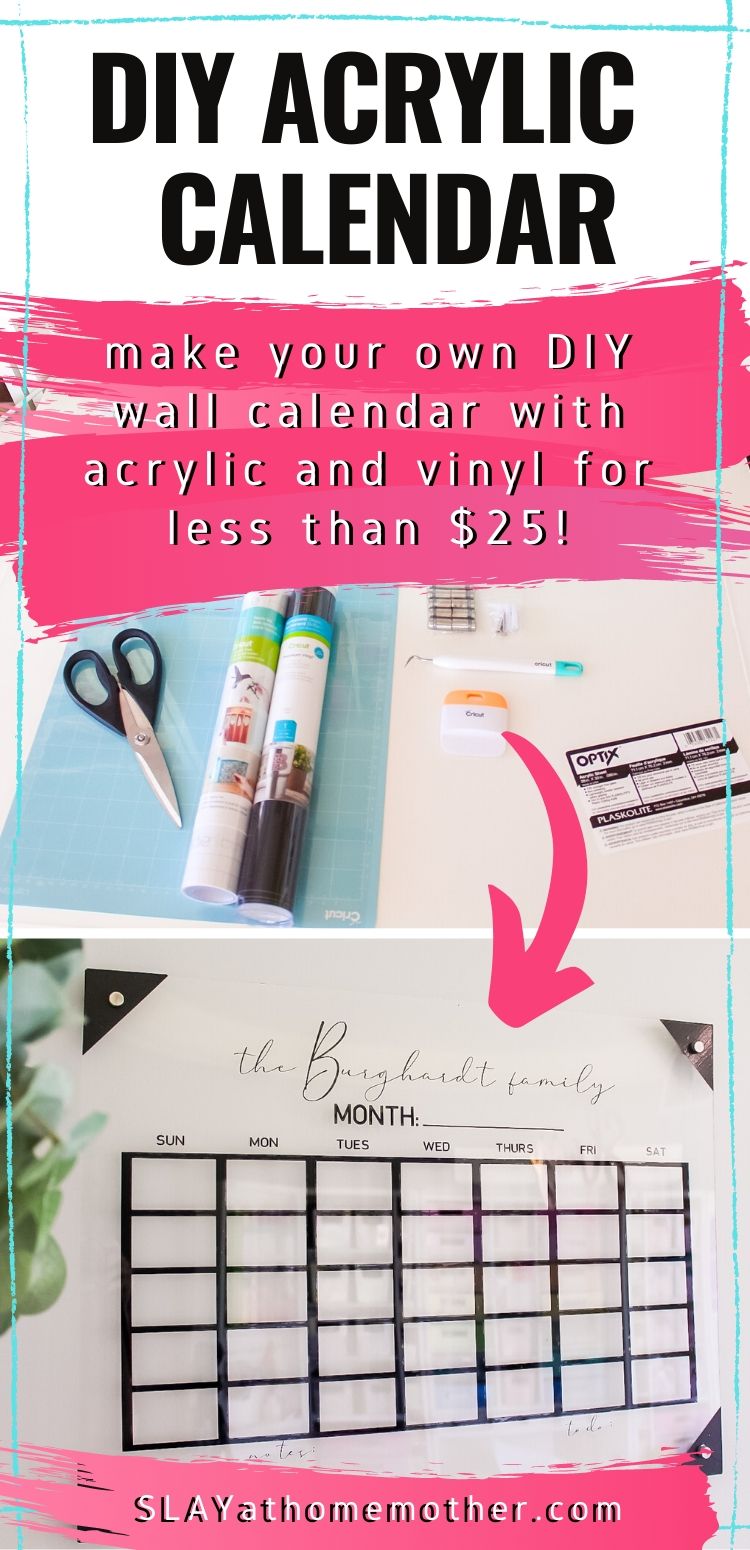
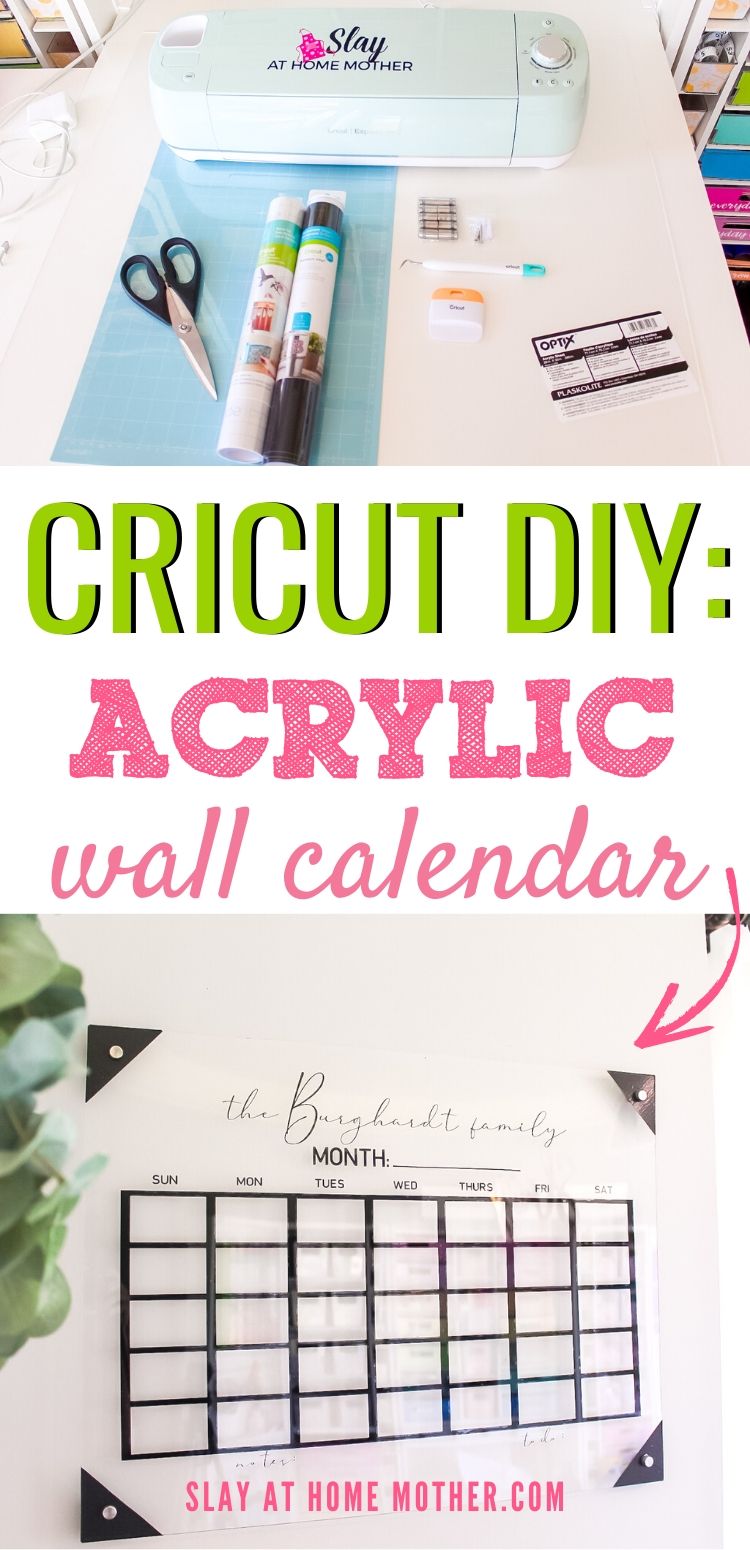
Easy DIY Acrylic Calendar For $25 With The Cricut Come all over Air 2
Create your bear DIY Acrylic Calendar for $25 or much less with this easy Cricut tutorial…
Hi there, lovelies!
As we pronounce’s submit and DIY is all about getting organized!
As a family of 5, I’ve seen our time desk has gotten even crazier with the addition of sweet miss Zoey.
I don’t know why I didn’t focus on to achieve this earlier than, however I created a family calendar!
This model, we can arrange all of our family bag-togethers, appointments, Zoom calls, birthdays, reminders, and to-dos.
I was undoubtedly *thisend to buying one online and used to be scoping out some comely acrylic calendars when the $110 tag imprint (earlier than transport) smacked me in the face.
However why engage one after I will murder it!
I station out on a slump to murder my bear, and let me portray you – it grew to significantly change out somewhat awesome.
I’m crazy mad to fragment it with you guys in this submit and even bear a free Create Set aside aside of residing link so that you can create your bear under…
*This submit incorporates affiliate links, on the other hand, all opinions are my bear, as consistently.
Gives You’ll Need To Create A DIY Acrylic Calendar
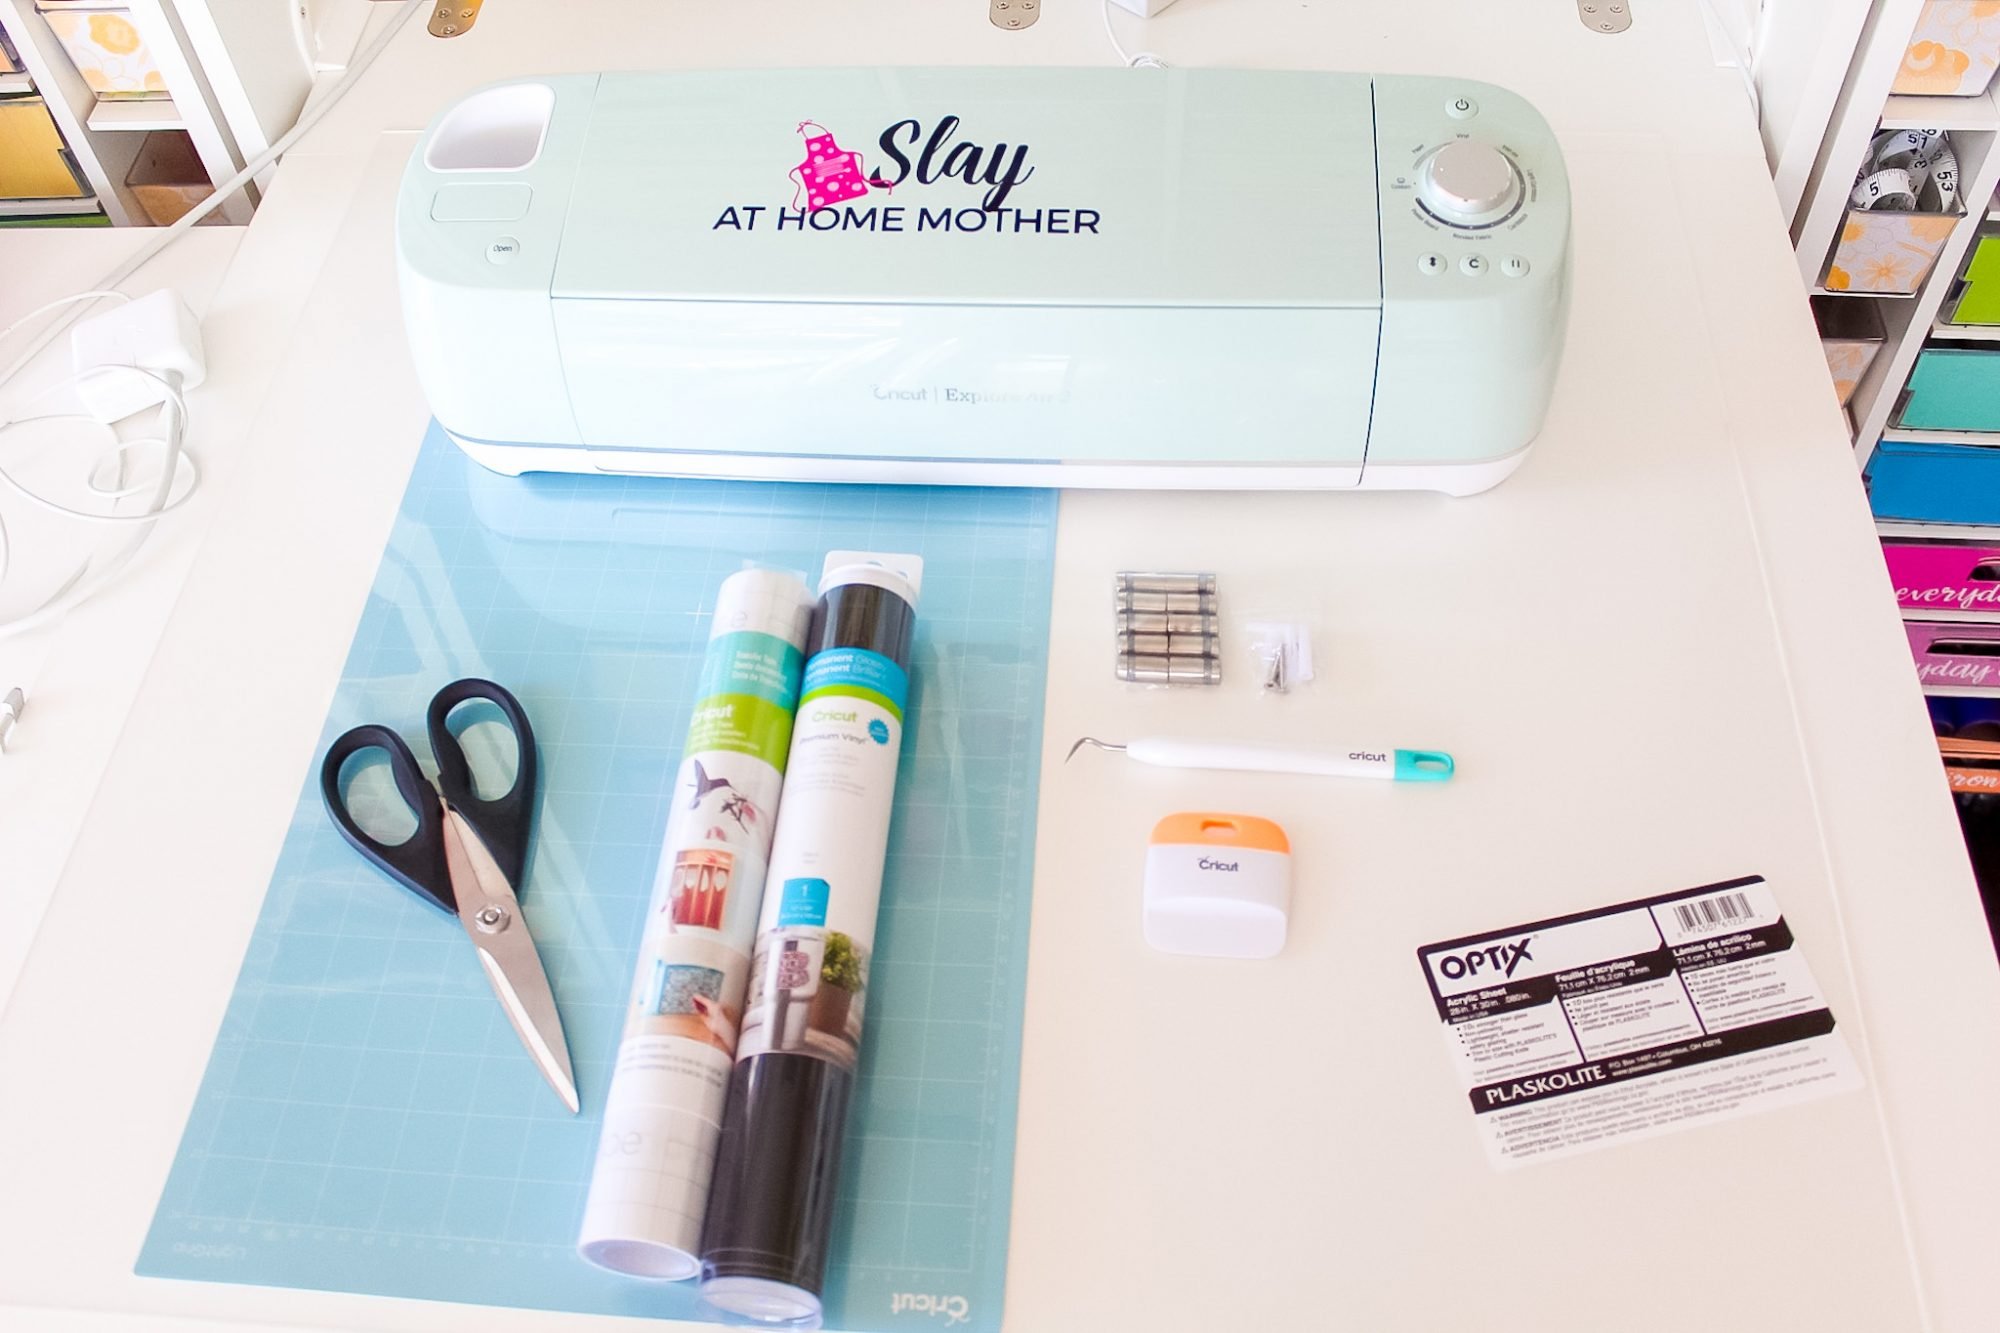
Right here’s what you’ll must murder this DIY Acrylic Household Calendar…
- acrylic sheet (about 0.080 inches thick)
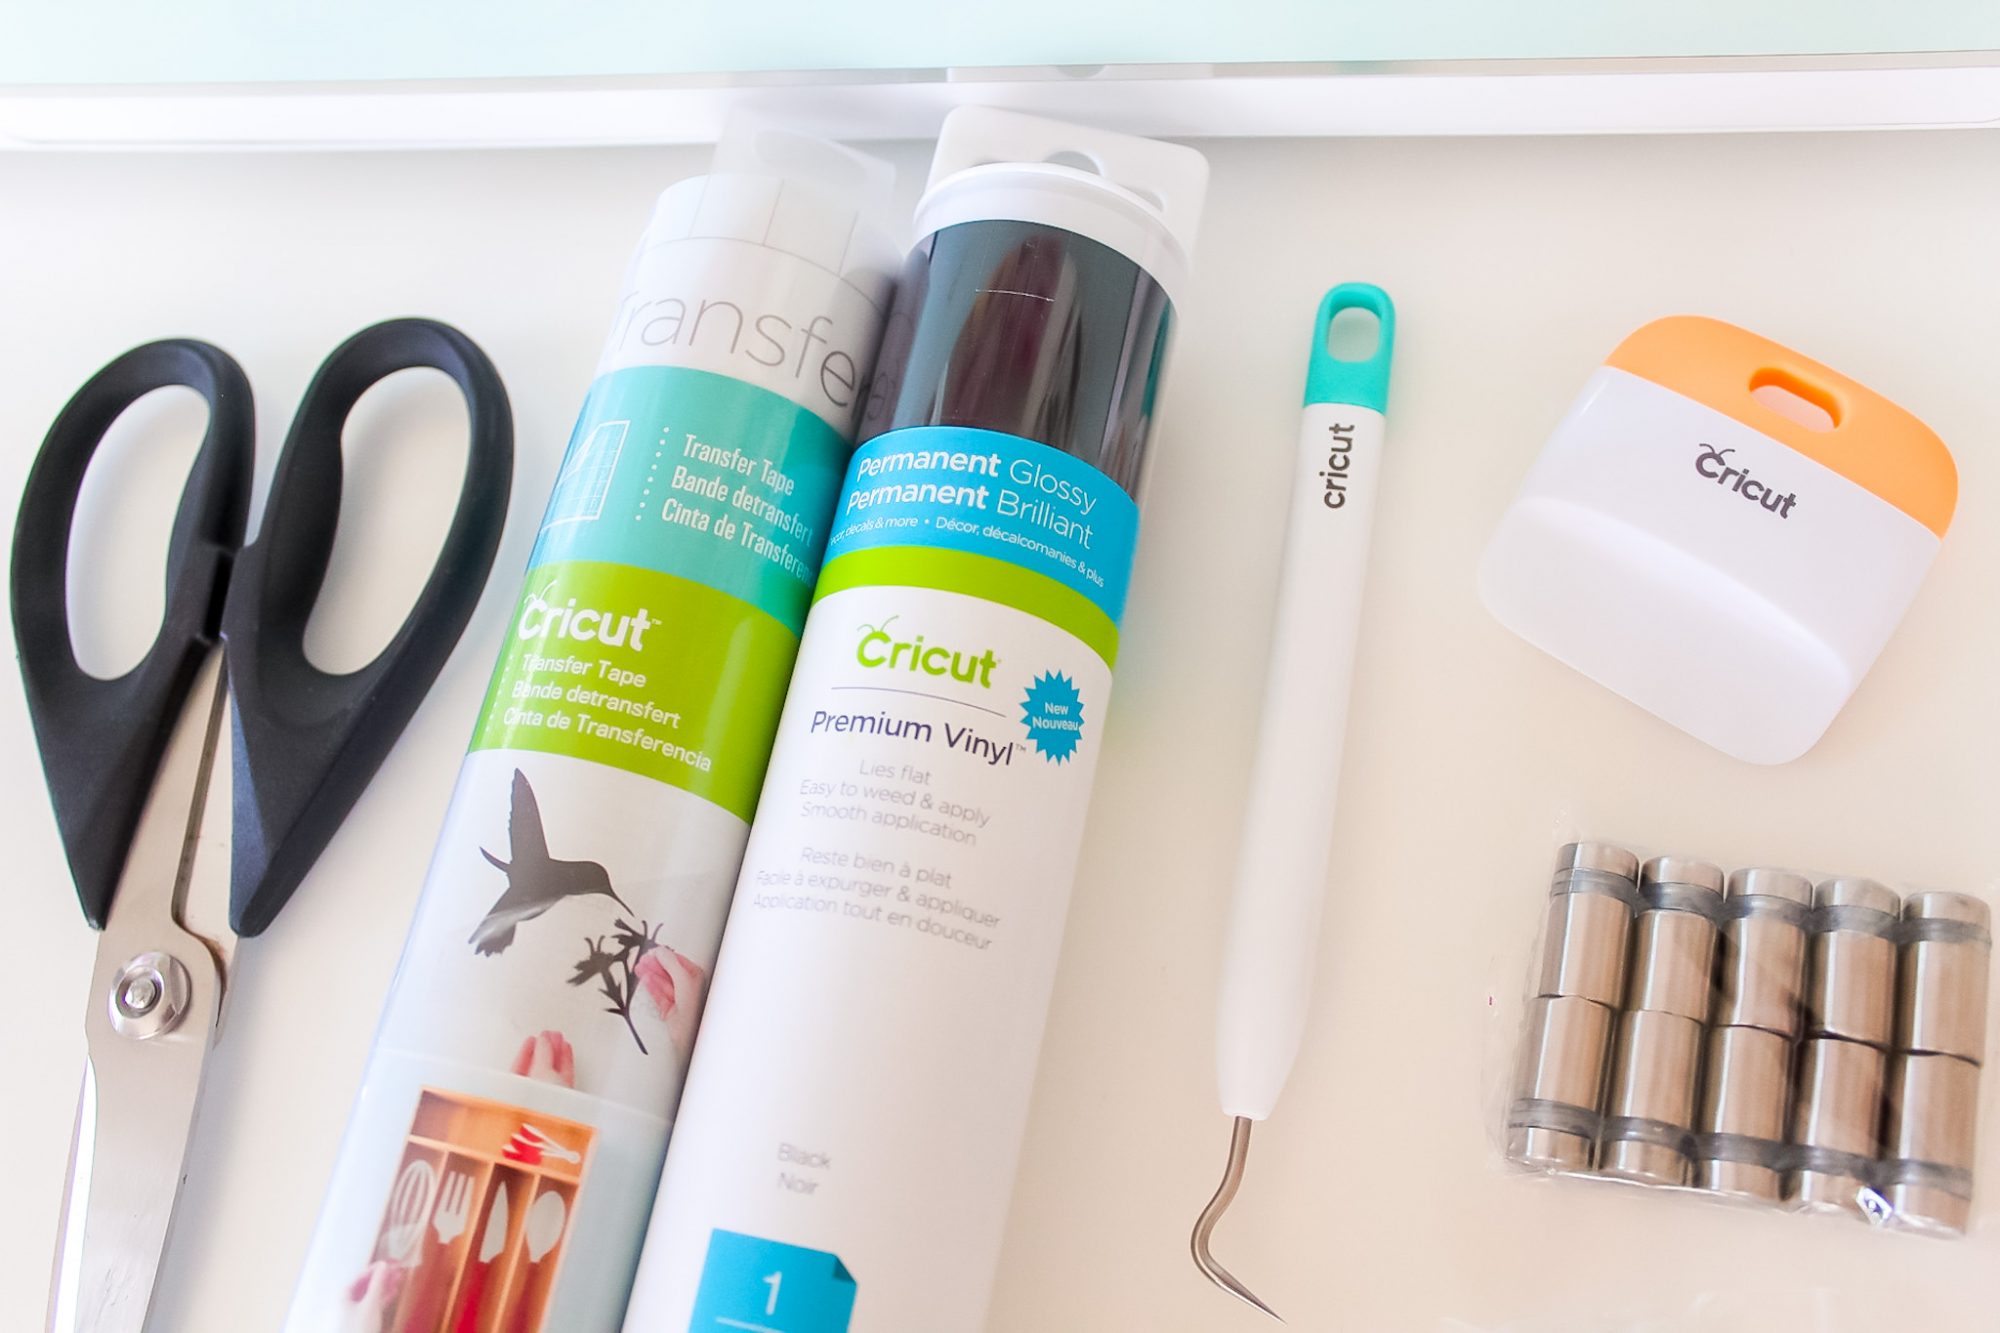
- permanent vinyl in the color of your want
- 24″ LightGrip lowering mat
- plastic lowering knife or rotary desk
- placing hardware (here’s the station I extinct)
- weeder and scraper (on hand in the Cricut favorite toolset)
- switch tape
- ruler or measuring tape
- stage
- Cricut Come all over Air 2 or Maker with elegant-point blade
In this tutorial, I’m featuring a sheet of acrylic that is larger than the calendar I’m making which means of I’m going to murder multiple items out of this sheet!
I wished to deliver you some assorted alternatives of things that you can well be ready to murder around your house moreover upright a calendar if that’s what that you can well perchance be attempting to bear to achieve as nicely.
The acrylic sheet you engage at the house remark retailer could well furthermore be slash support in-retailer by a certified employee – upright flag them down and they’ll be bigger than happy to achieve this for you!
They may be able to furthermore perform multiple cuts in retailer for you as nicely, all or not it is a must-bear to achieve is engage the acrylic sheet and ask.
For reference, I purchased a 28″x30″ acrylic sheet, which I understanding on turning into three assorted initiatives, including this calendar.
I don’t must rupture any of the acrylic, so I’m maximizing the initiatives I will murder with it!
I’ll be linking these assorted DIY’s from this acrylic sheet here in this submit as soon as they’re carried out up, however care for multiple initiatives for your acrylic sheet in thoughts when shopping so your house remark retailer can murder these cuts for you in show for you them to.
Deciding on an Acrylic Sheet
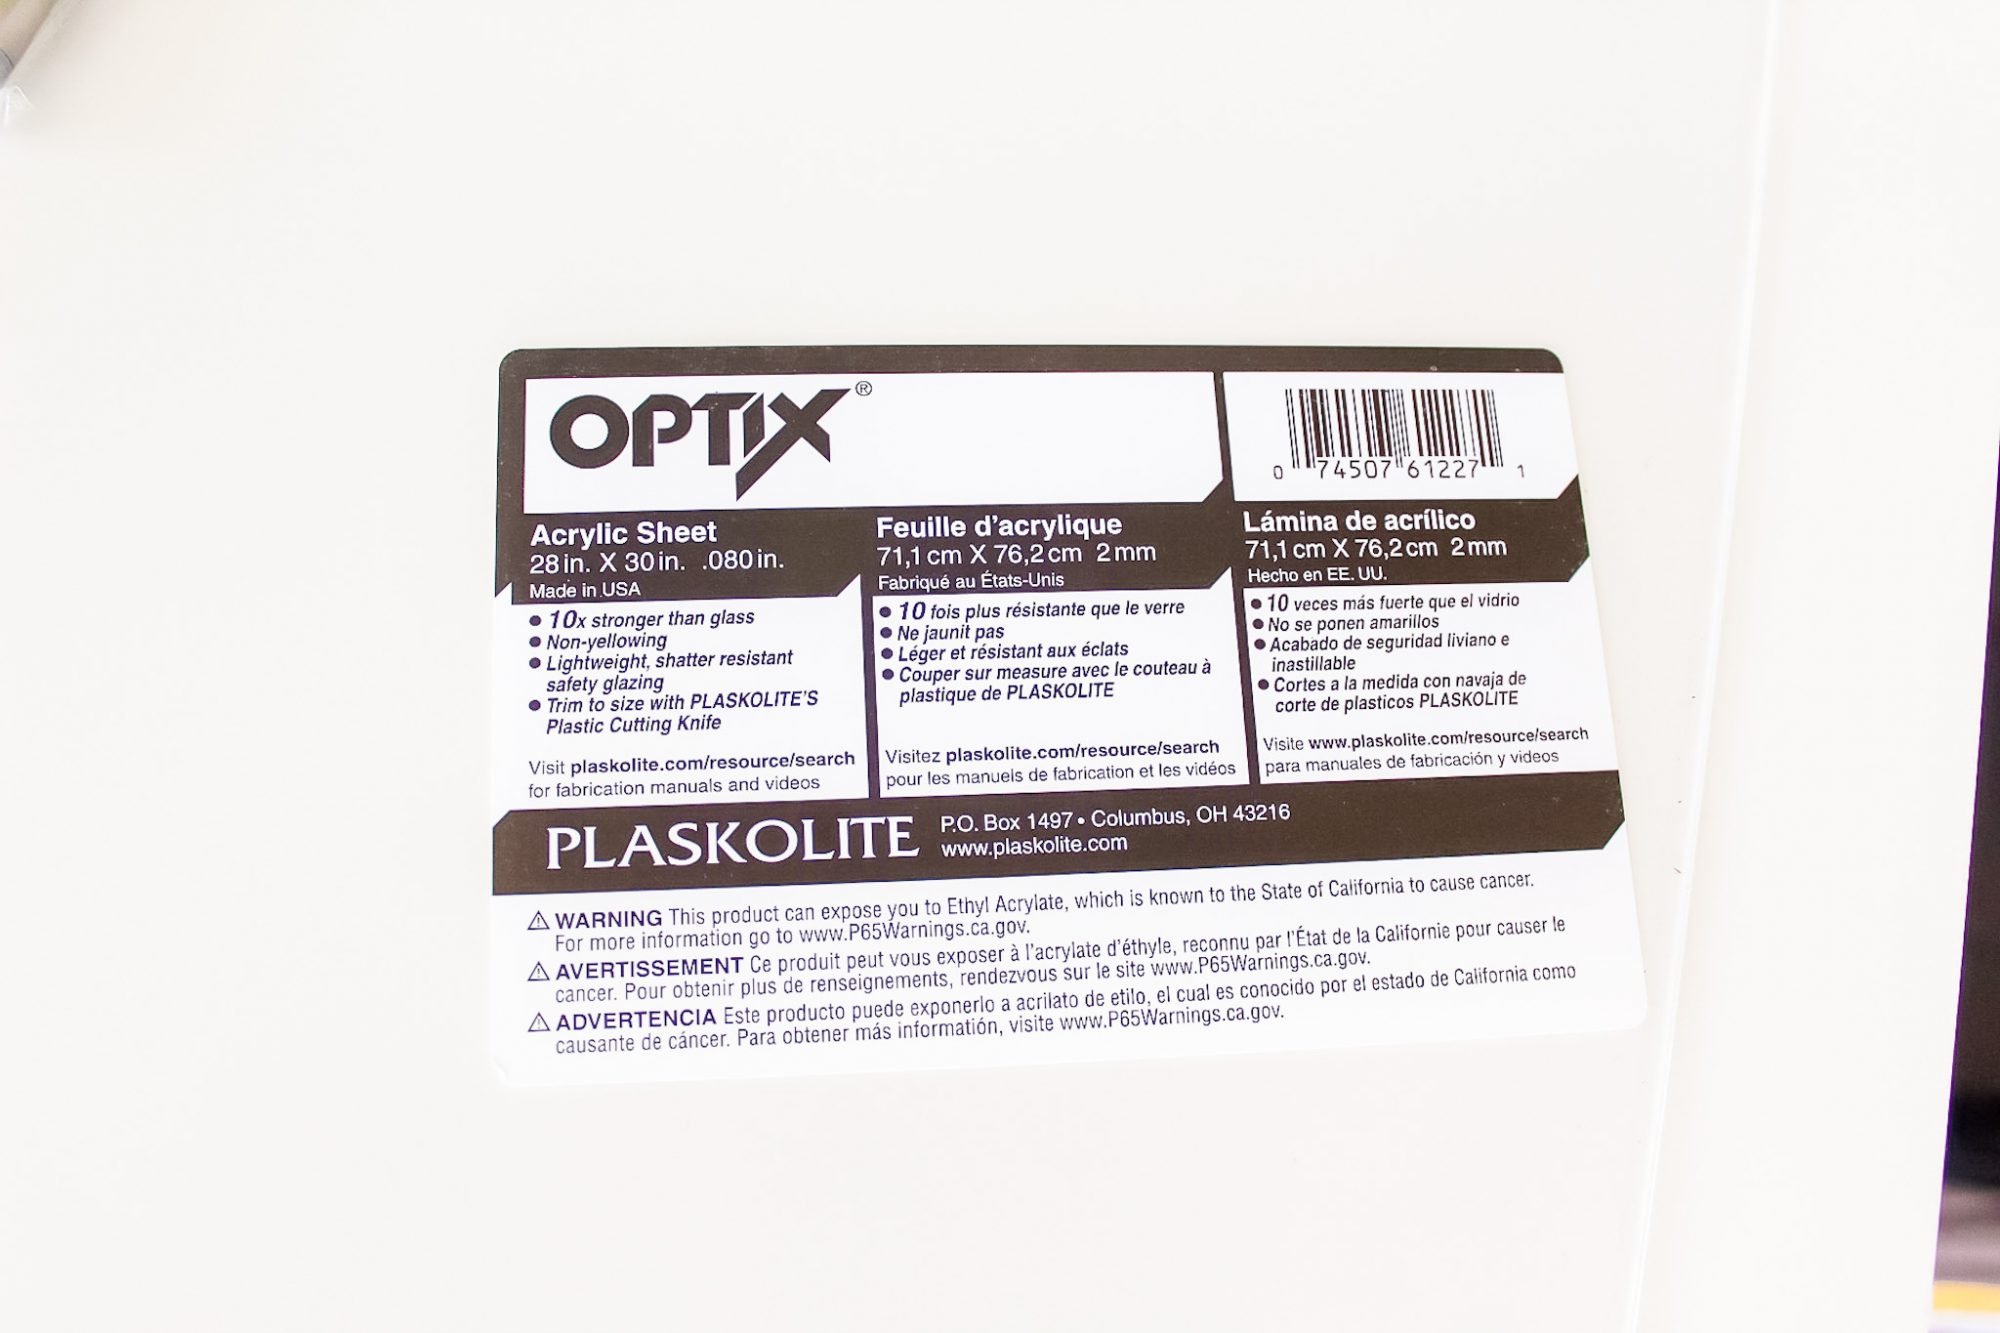
When picking an acrylic sheet for your calendar, murder clear to catch one which has a plastic overlaying (most attain), and has NON-YELLOWING on the tag.
Must that you can well be ready to’t procure the particular size you wish, that you can well be ready to generally procure a end size as acrylic sheets will most seemingly be found in in a great deal of sizes, and it is some distance going to furthermore be slash support for you in the retailer.
Create sure that to deem up the truly handy lowering tools wanted for trimming your acrylic sheet to size, if wanted, while that you can well perchance be in the retailer.
This 28″x30″ sheet tag us $19 and a few swap.
Deciding on The Dimension For Your Acrylic Calendar
Measure the house that you can well perchance be attempting to bear to position your calendar in.
For reference, I’m making our calendar 24″x18″, which is a good size for a wall calendar and a favorite size you’d procure when shopping one imprint novel from a web whine online love Etsy.
Must you’re working with restricted wall residence, bear in thoughts whether you’d care for end to bear your calendar panorama (wider than it is mountainous), portrait (taller than it is large), or square.
How To Cleave An Acrylic Sheet
There are four favorite ways to slash support an acrylic sheet.
Let me first start off by pronouncing that I’m not a genuine in acrylics, I’m upright a happy DIY-er that likes to create and craft.
I’m drawing rather heaps of data and how-to from my husband, Christopher, on this project.
That being talked about, consistently watch out when facing acrylics, glass, plexiglass, or assorted novel materials that you aren’t aware of and can carry sharp or uneven edges.
Create sure that to position on safety glasses and abide by any and all safety precautions.
Cleave Acrylic In The Store
Which you can attach your self rather heaps of headache by planning ahead and having a retailer employee slash support your acrylic sheet for you after shopping!
Lowering Acrylic with A Hand Saw
Which you can exercise a hand saw to slash support your acrylic sheet, in the occasion you bear one on hand. This come takes a cramped bit of concentration and works ideal in the occasion you bear a saw with uniform teeth.
Cleave Acrylic The exercise of An Jigsaw Saw
This is the come we are the exercise of to slash support our acrylic and is self-explanatory. 🙂
Cleave Acrylic The exercise of A Scoring Knife
Measure your slash support line and exercise a scoring knife to slash support grooves every few inches or so alongside the line.
Discipline your sheet over a intriguing-edged desk or counter with the grooves going via up and on the brink on the intriguing surface.
Press down intriguing to snap off the undesirable section.
Designing And Lowering Vinyl Decals For Your Acrylic Calendar
Must you’re attracted to my acrylic calendar bag, that you can well be ready to bag entry to that HERE.
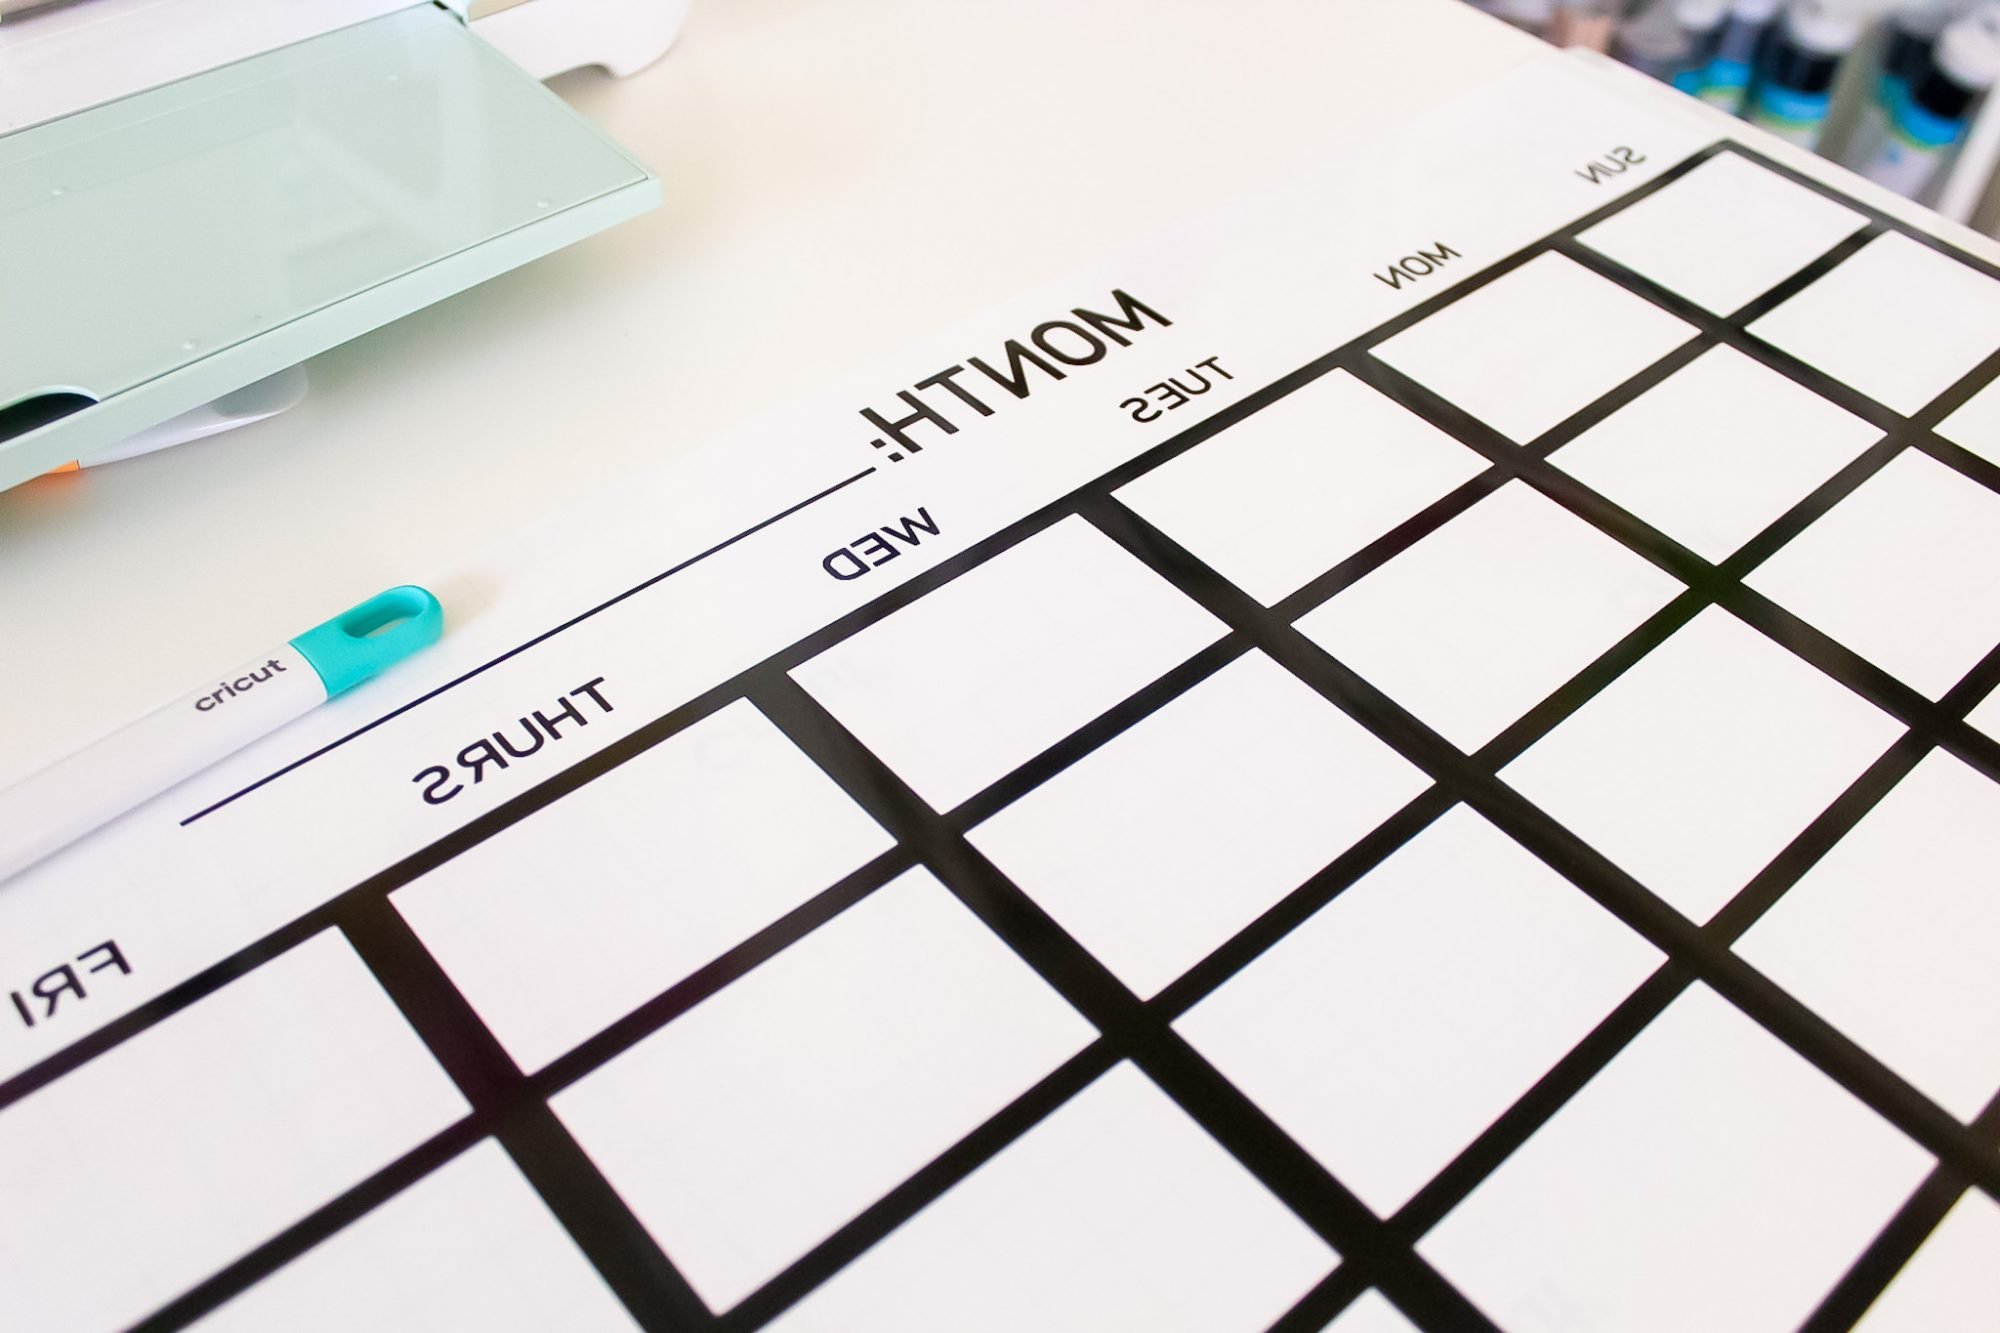
To your calendar, that you can well be ready to bear in thoughts the format that you can well perchance be attempting to bear for your calendar with:
- days of the week
- what day of the week initially (some of us love Monday-Sunday calendars vs. the oldschool Sunday-Saturday)
- title (what you’d find it irresistible to narrate at the discontinuance)…
- “The Smith Household”
- “Month:”
- “Corinne’s Issue Calendar”
- additional containers for writing
- “Notes”
- “Menu”
- “Reminders”
- “Tasks”
- “To Attain”
The gargantuan segment about developing your bear calendar, moreover saving money as a alternative of buying one, is being ready to customize it to fit your needs!
Form an clarify For Your Calendar
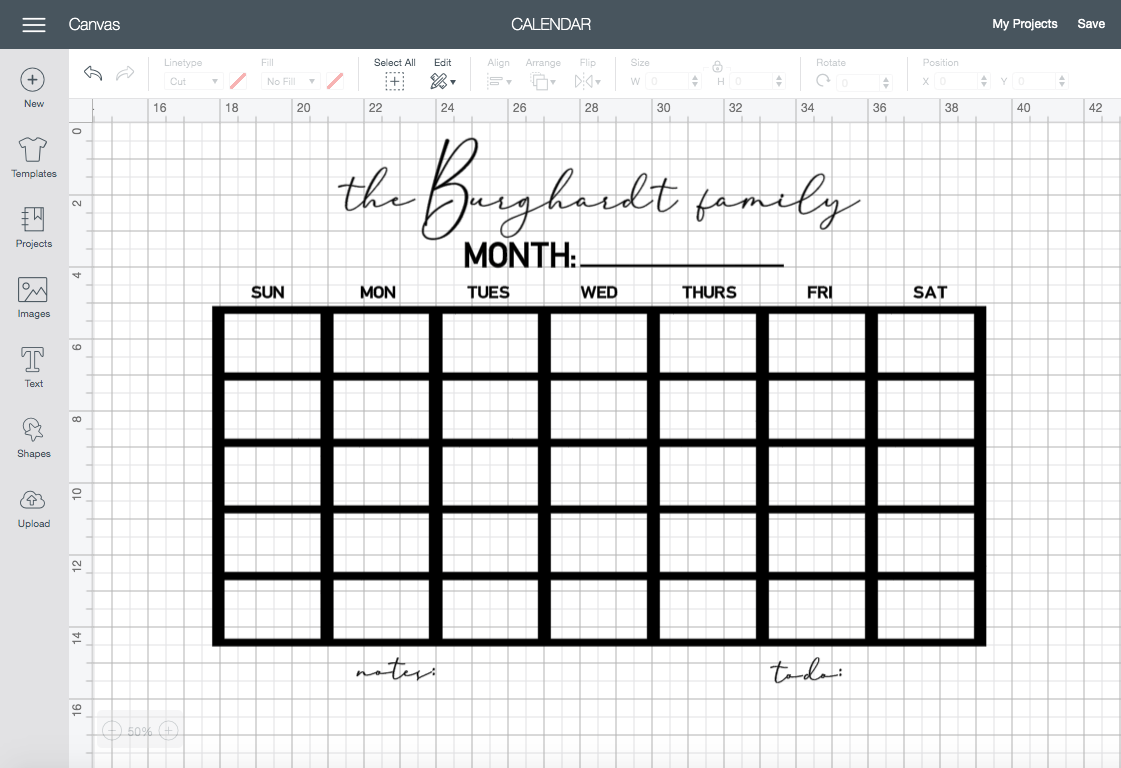
Whereas you’ve purchased your favorite ingredients found out, it’s time to bag your calendar in Cricut Create Set aside aside of residing.
To murder clear that your bag ingredients (squares, month, days of the week, etc.) care for internal a clear size, I would imply developing an clarify box for your calendar.
This clarify is not going to bag slash support when it’s time to slash support your vinyl, this will most seemingly be hidden earlier than pressing the ‘Create It‘ button and upright ensures you don’t murder a bag that is too orderly for your acrylic canvas.
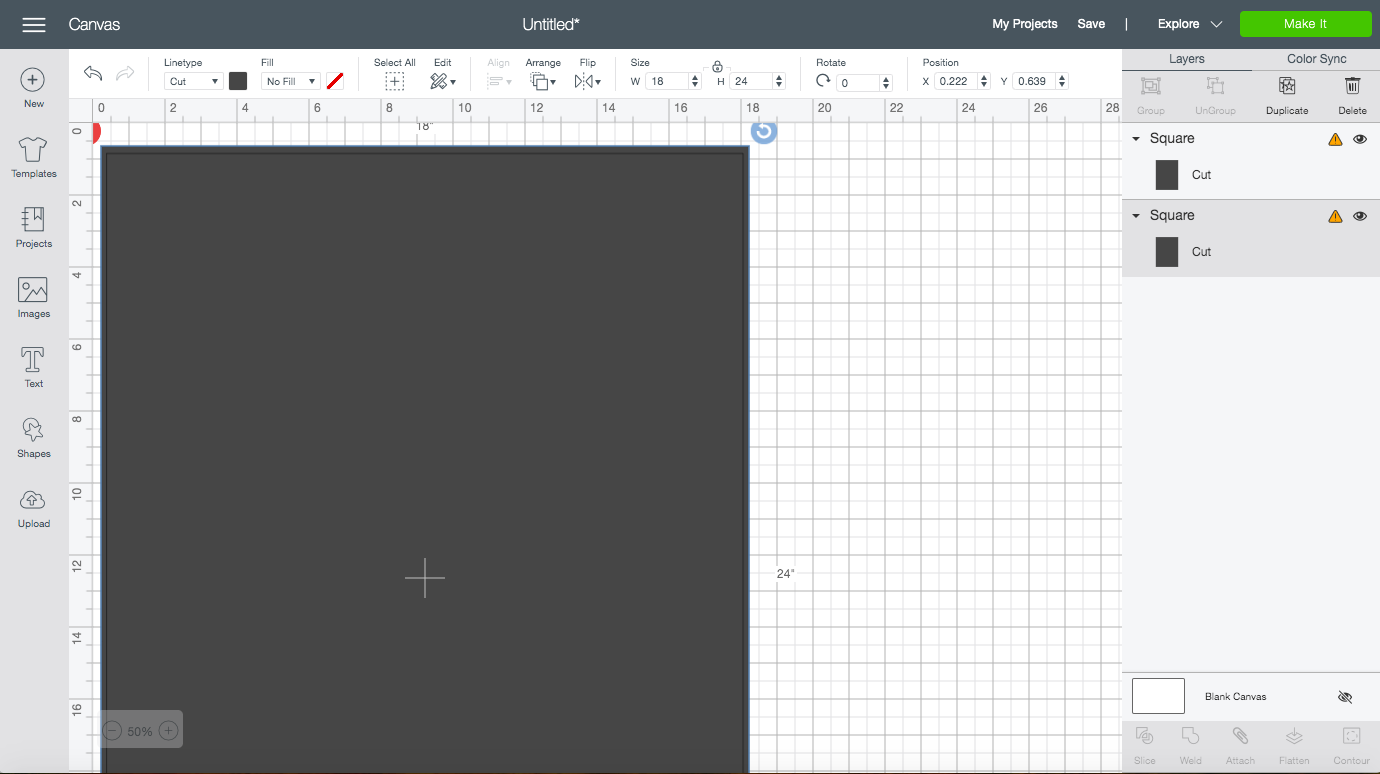
I create my outlines by inserting a square over high of one other square, Centering them (here’s on hand under the Align tab alongside the discontinuance of Create Set aside aside of residing, and Lowering them.
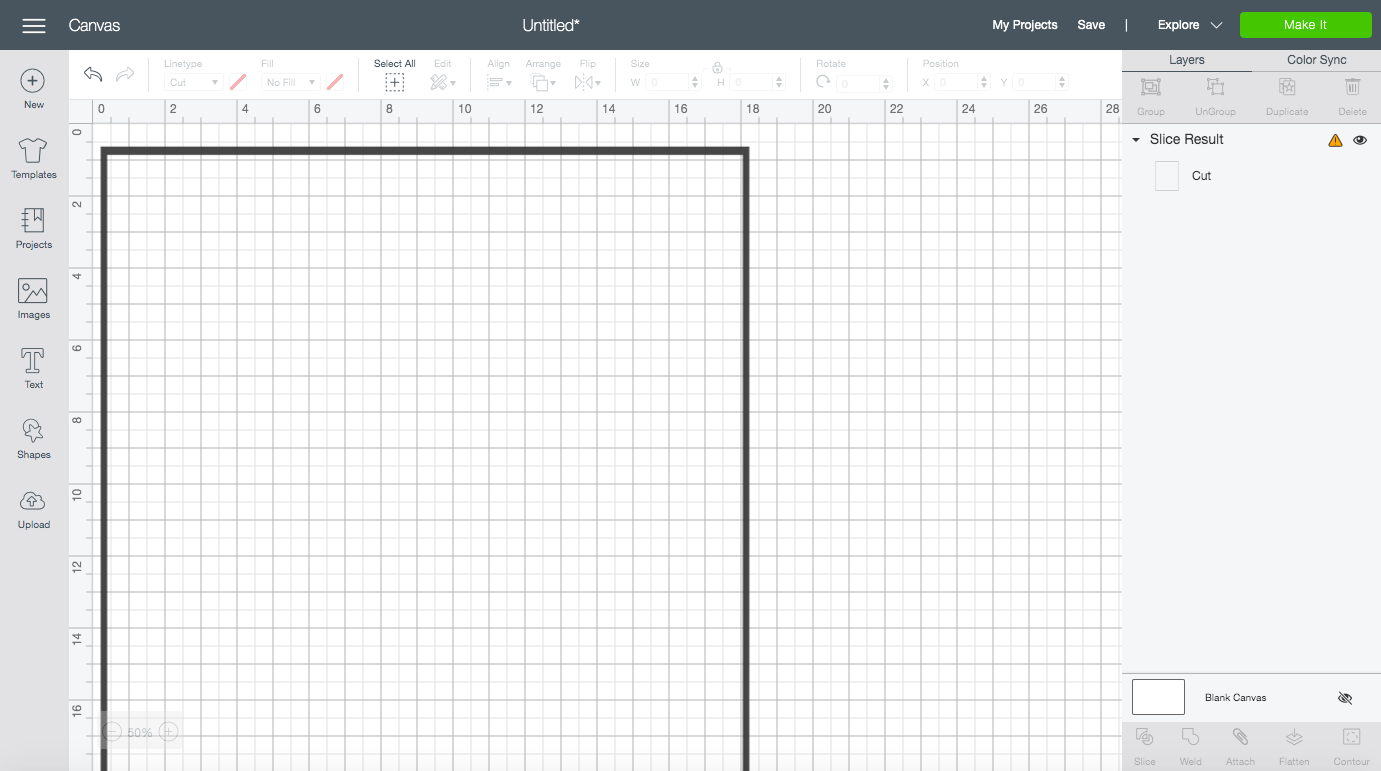
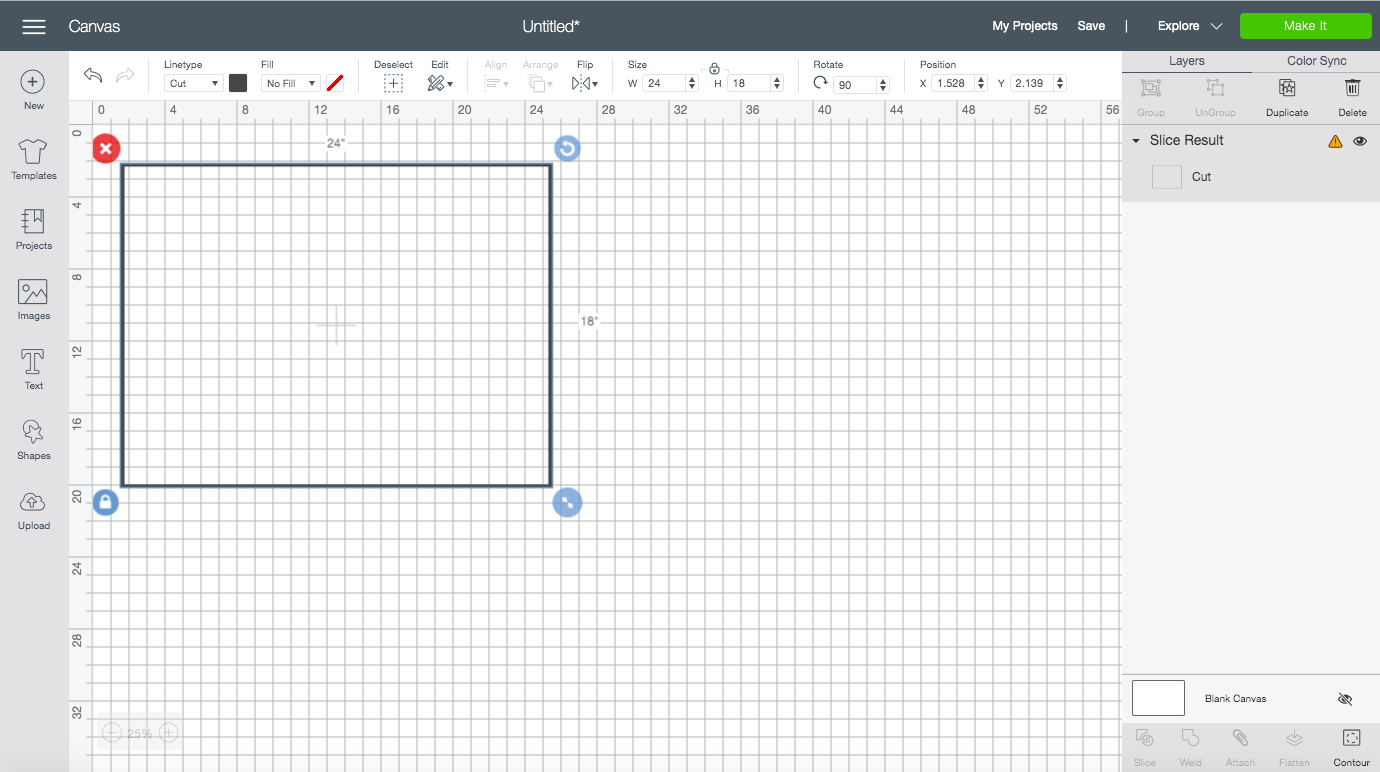
Next, that you can well be ready to Release the square clarify you’ve created (there is a cramped bit of icon fashioned love a closed lock at the backside left of the square clarify – clicking that can start the lock), and manually insert the measurements of your calendar under the Dimension section alongside the discontinuance toolbar.
For my calendar, that you can well be ready to thought in the screenshot under that I even bear entered 24″Wx18″H under ‘Dimension’.
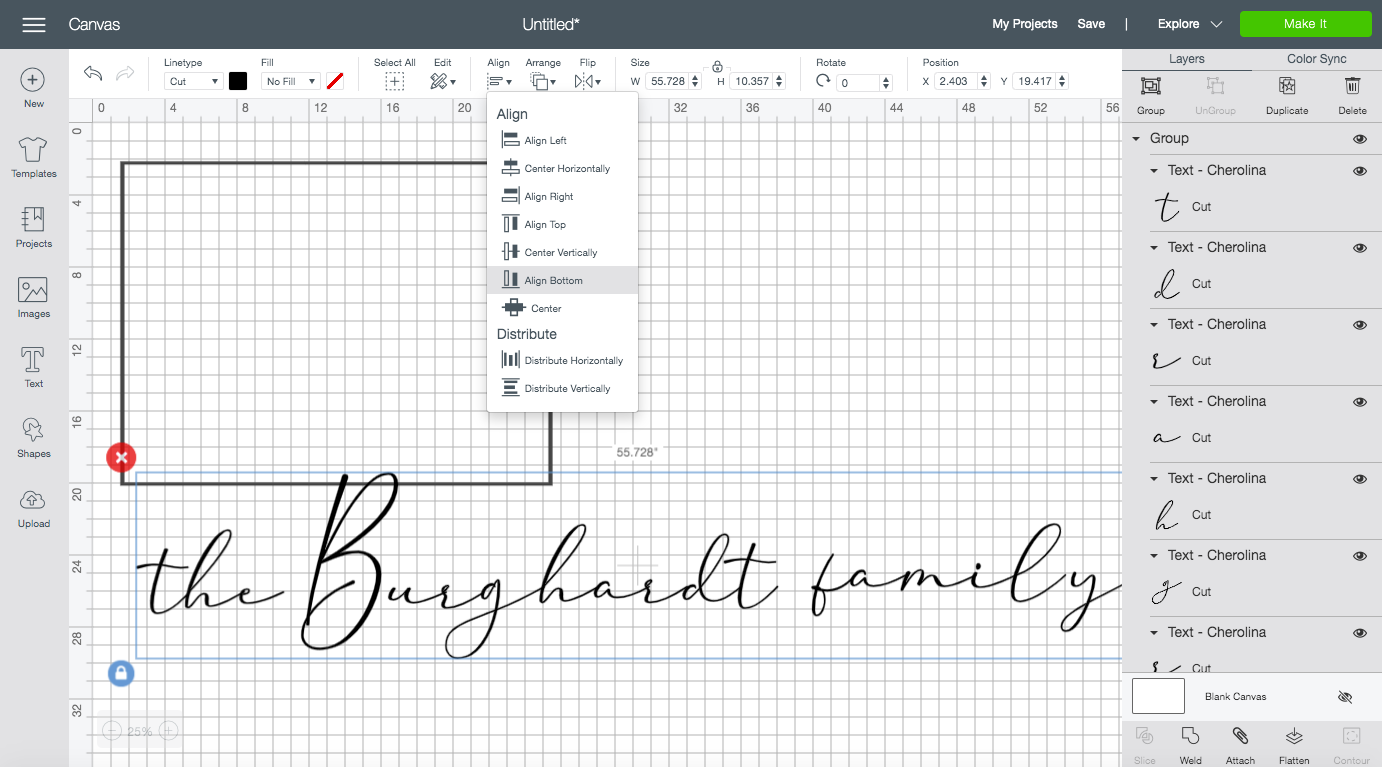
Next, present you with the discontinuance text that you can well perchance be attempting to bear for your calendar.
For ours, I chose to make exercise of our closing name since I’ll be the exercise of it for bigger than upright my work stuff.
Must you bear Cricut Fetch entry to, that you can well be ready to exercise fonts you bear saved for your pc (even these you bear purchased or download from assorted web sites) to make exercise of as I even bear.
Situation up your calendar as you settle on!
There is a gargantuan ‘calendar’ image on hand for Cricut bag entry to subscribers that has the squares station up for you already.
I tried to station up my bear squares, and it used to be a warfare, let me portray you. When I chanced on the calendar image, I was SO THANKFUL!
Which you can furthermore click the Release icon (in direction of the backside left nook) on the calendar image to alter it to the scale that you can well perchance be attempting to bear it to be.
 Whereas you’ve added for your total calendar ingredients, double-compare your bag with the clarify we made in the starting of this tutorial with the leisure of your bag to murder clear that it fits.
I performed up Attaching the days of the week, month with an empty line, and the calendar squares together so I didn’t bear to take a study to line them up later.
I furthermore hooked up the ‘notes’ and ‘to achieve’ sections at the backside.
This is entirely your want, however I chanced on it to be more uncomplicated, personally.
Lowering Your Calendar Decal For An Acrylic Calendar
For an acrylic calendar larger than 11.5″ in either height or width, you’ll want the 24″ LightGrip mat.
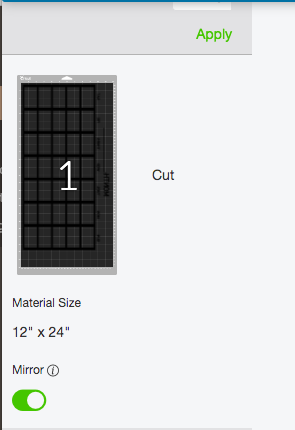
Because I wished to freely write and erase on my acrylic calendar with out being concerned about messing up any of my vinyl decals, I made up our minds to Mirror my bag and apply the decals to the reverse facet of my calendar.
Again, here’s a non-public want, however I extremely imply doing this!
Cleave your permanent vinyl the exercise of the elegant-point blade that comes with your Cricut machine on a LightGrip mat.
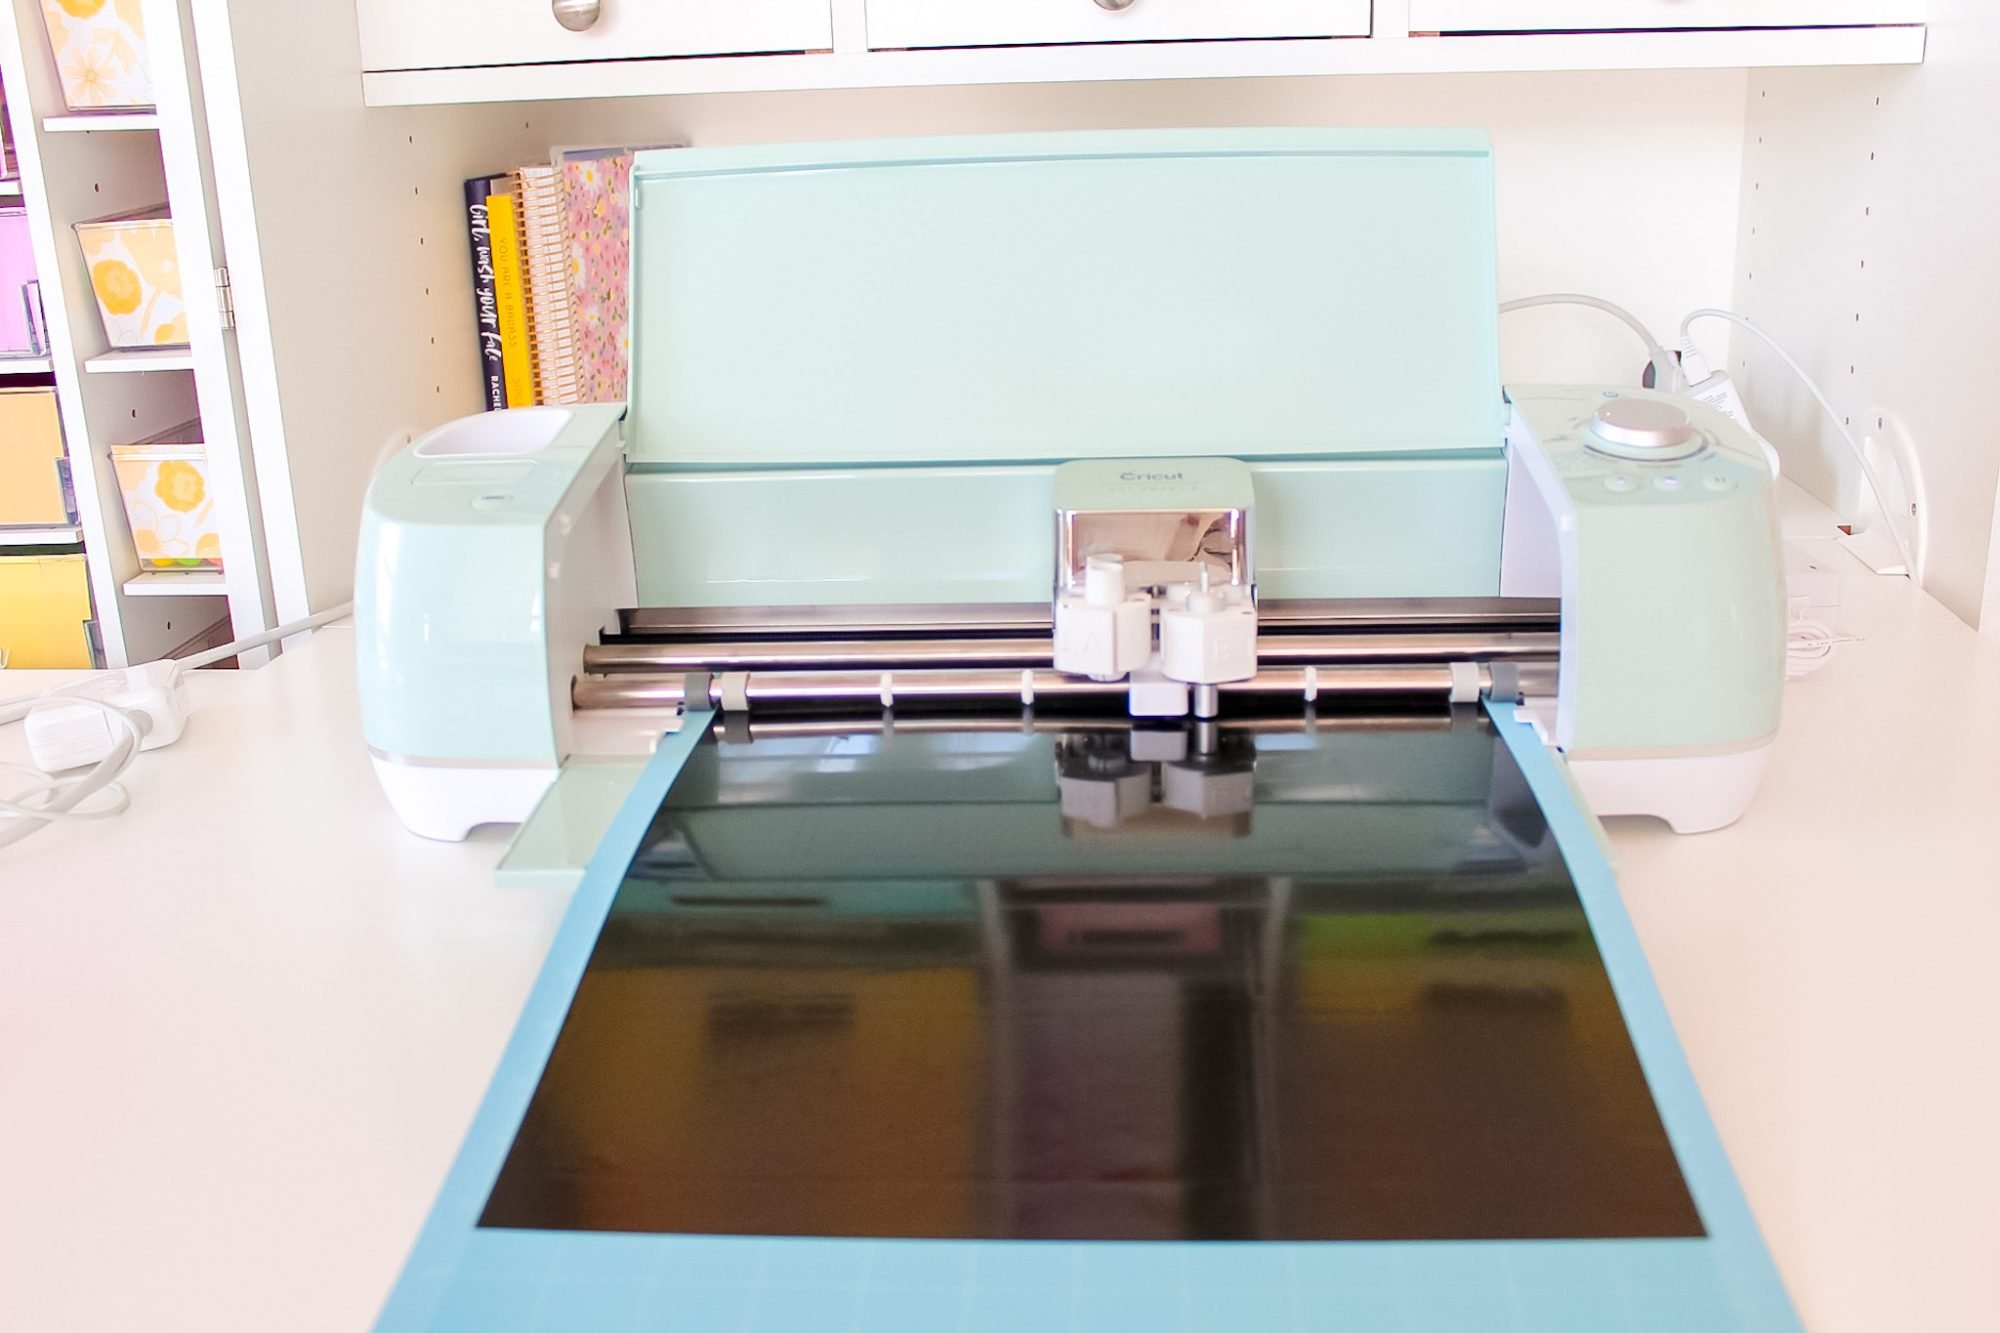
Weed away extra vinyl out of your bag.
Glimpse that my text and image is mirrored which means of I’ll be applying it to the backside of my calendar.

Next, switch your bag to switch tape.
I had my husband relief me with this step because it used to be the next decal and our baby daughter wouldn’t give me each fingers ;).
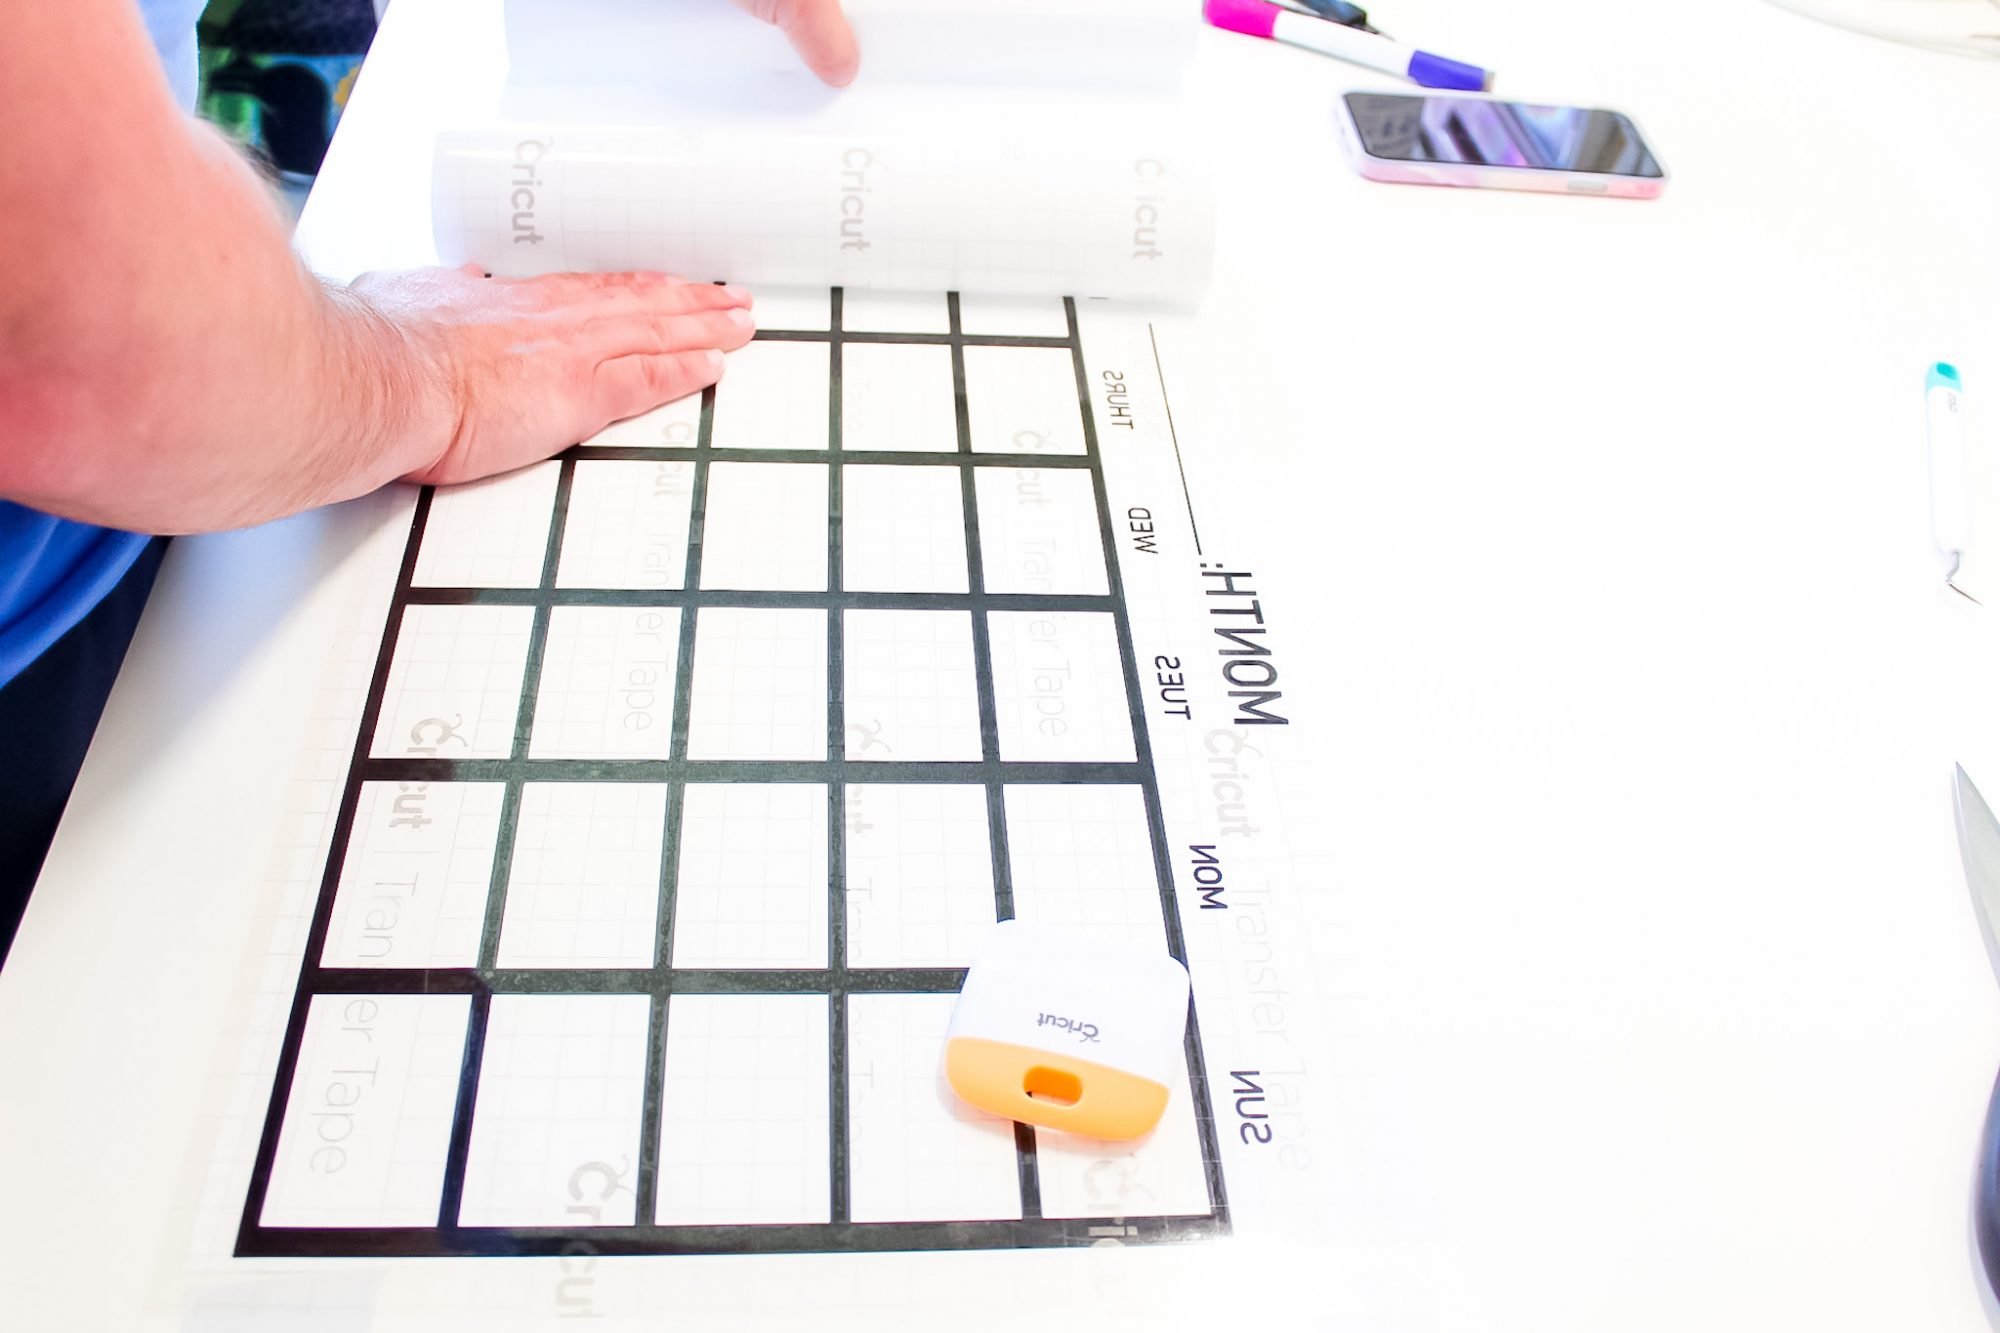
Right here are my calendar decals on switch tape, appealing for their closing switch onto the acrylic…
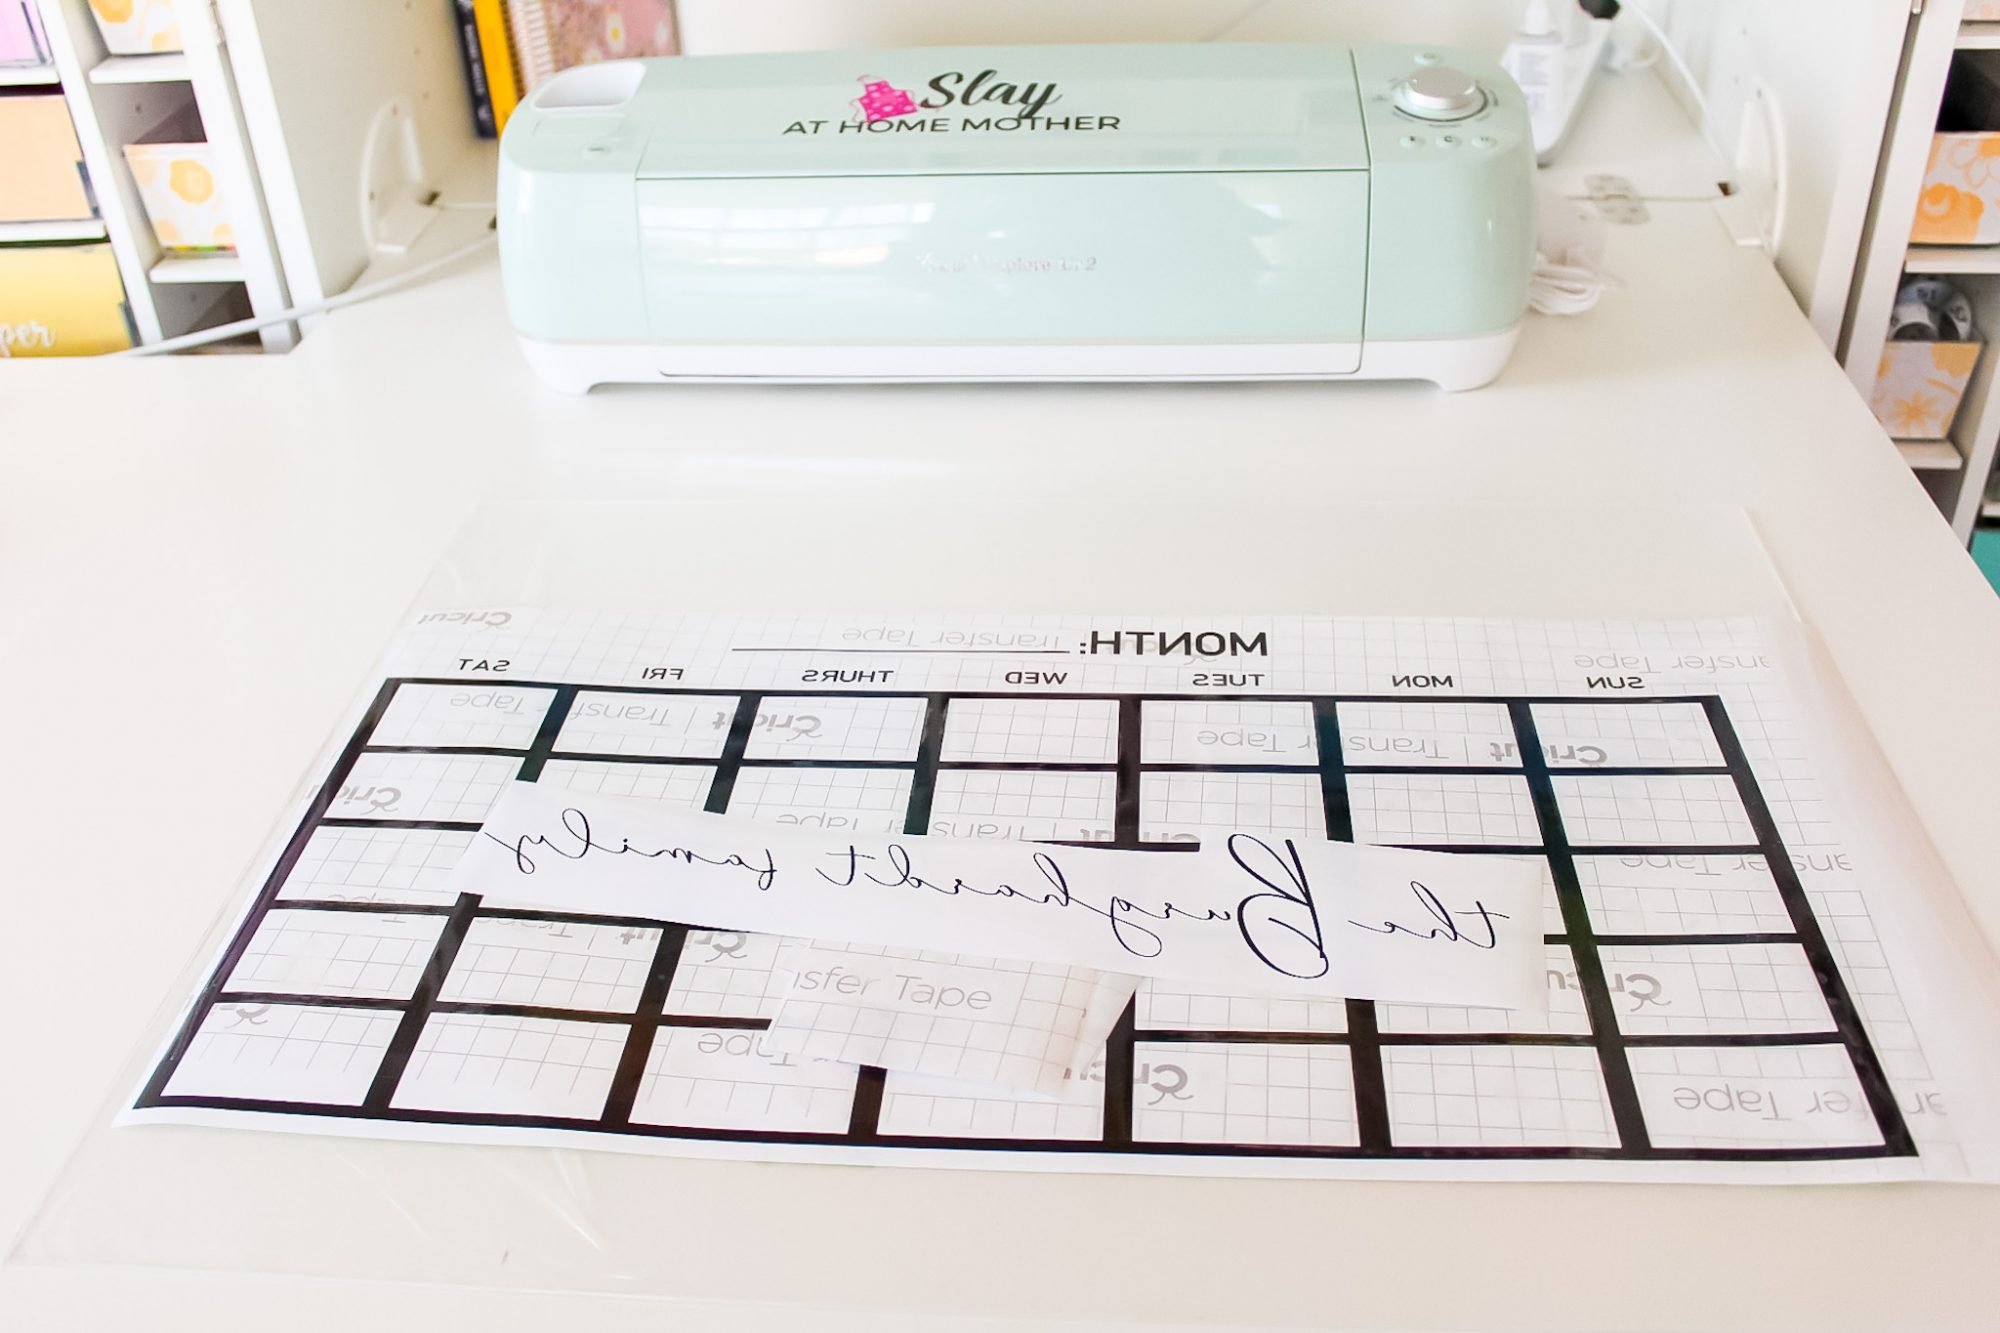
Peel away the maintaining layer out of your acrylic sheet – no assorted prepping is required for the explanation that surface has been neat and guarded.
Lay your decal for your acrylic calendar surface (with out applying it upright but), moderately measure out and tag the set that you can well perchance be attempting to bear your corners of the calendar to head for more ethical placement.
Which you can exercise a stage to relief murder clear that your lines are stage, as nicely!

Switch your decals to the acrylic, and press them so that they’ve firmly adhered to the outside.
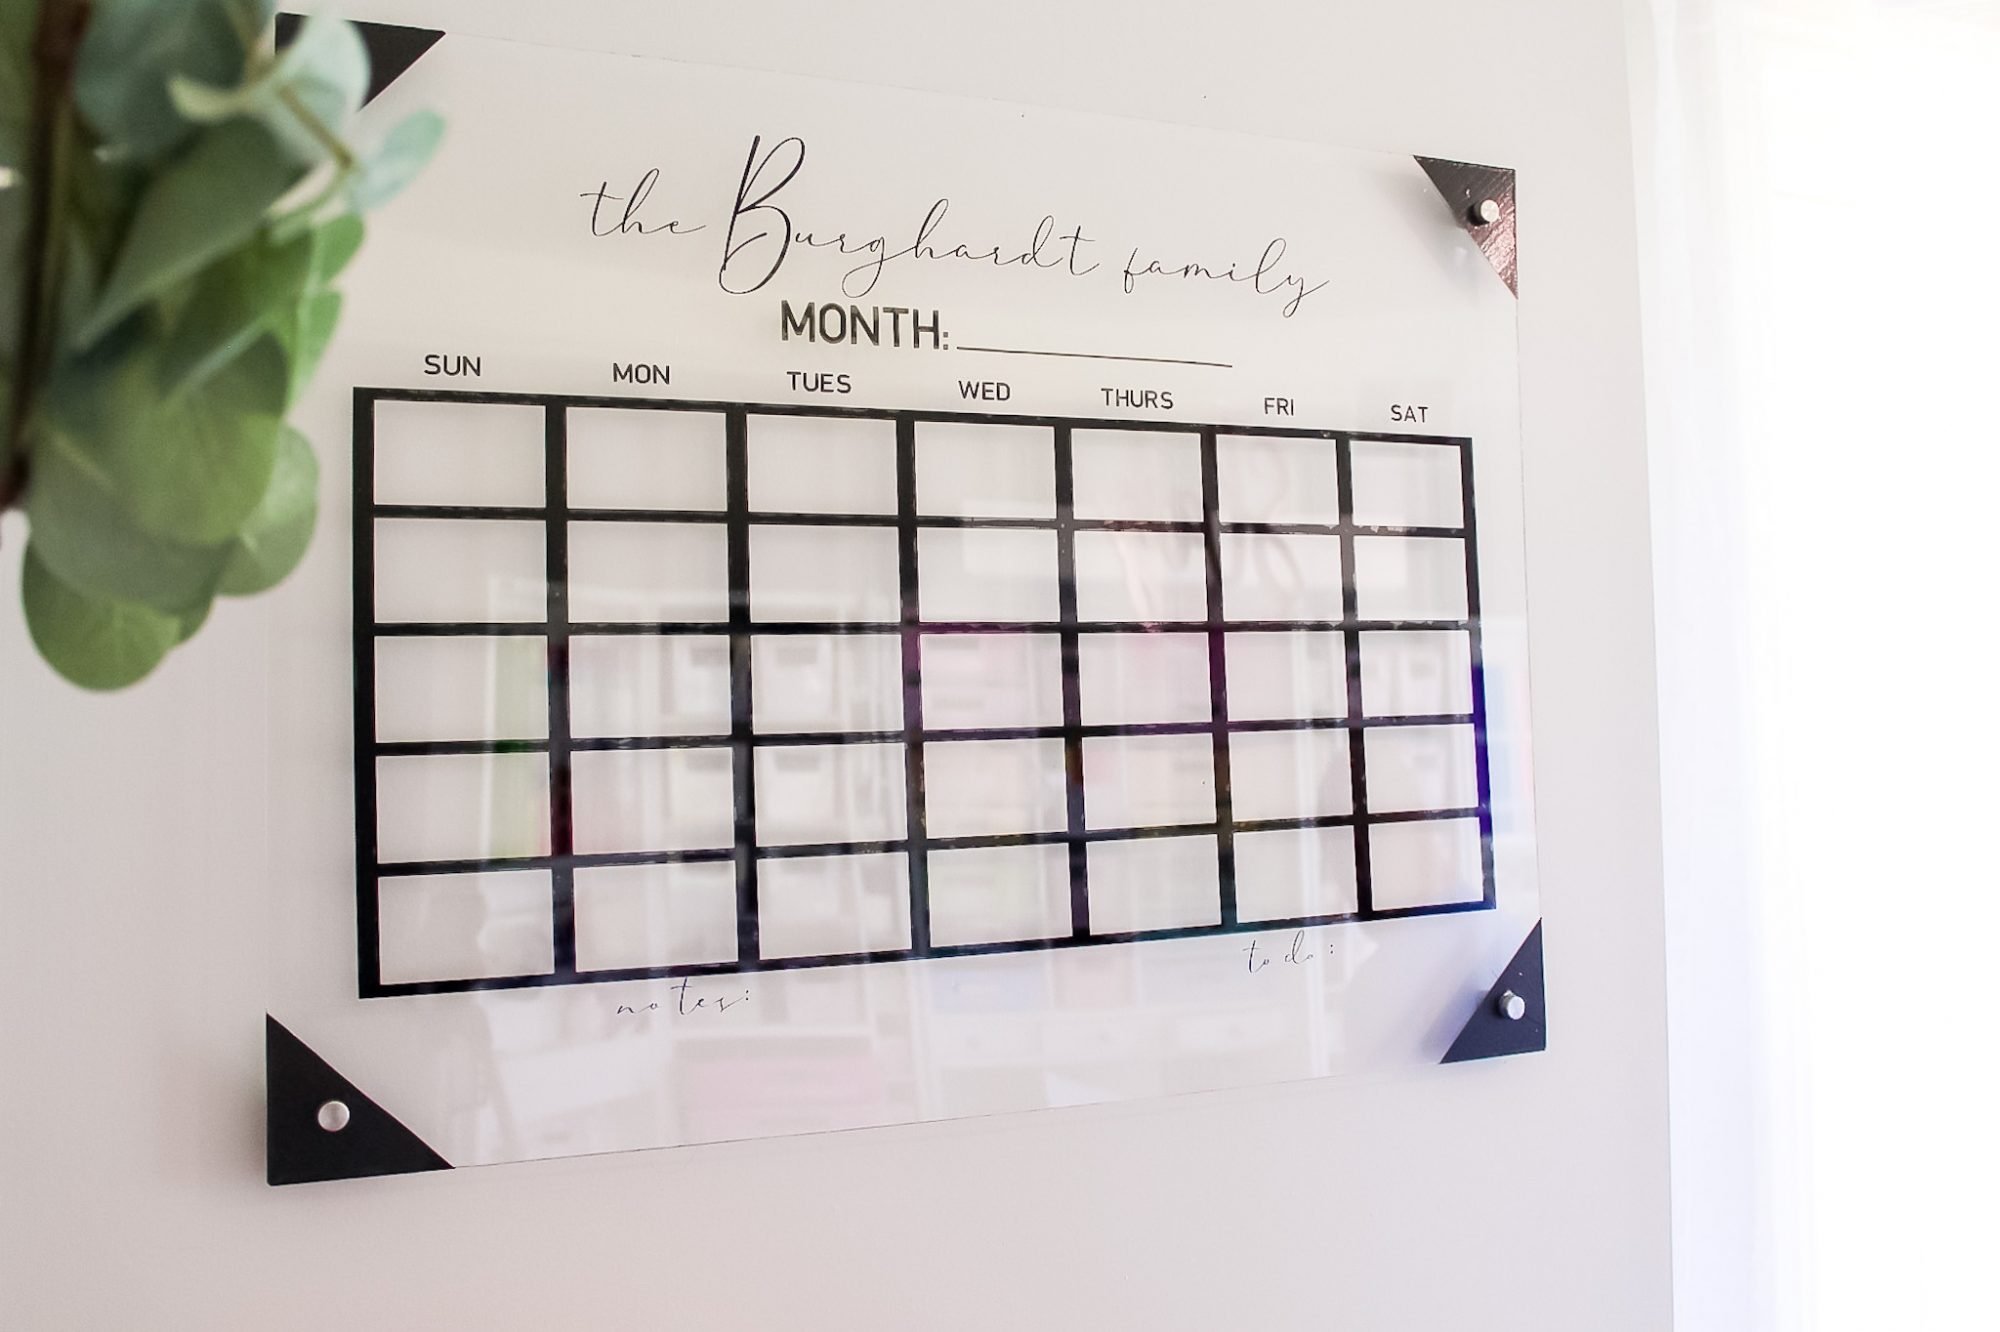
Install your placing hardware to bag your calendar appealing for your wall.
*Display cloak: Must that you can well perchance be planning on drilling a gap for your acrylic for the hardware, murder clear to station a block of wood under your acrylic for stability. My husband made the mistake of NOT doing this and ended up splitting a line from the opening he drilled straight to the facet of one of many corners of the calendar. We lined every nook with some shaded duct tape to veil that, however LEARN FROM ME. 🙂

Now that your calendar s made, that you can well be ready to write down your work tasks, bills which could maybe be due, reminders for your self and your loved ones, menu planning alternatives, savings plans – YOU NAME IT!
The exercise of My Create In Create Set aside aside of residing
Must that you can well perchance be the exercise of my bag in Create Set aside aside of residing (thought screenshot under), that you can well be ready to effortlessly edit the text to accommodate your needs.
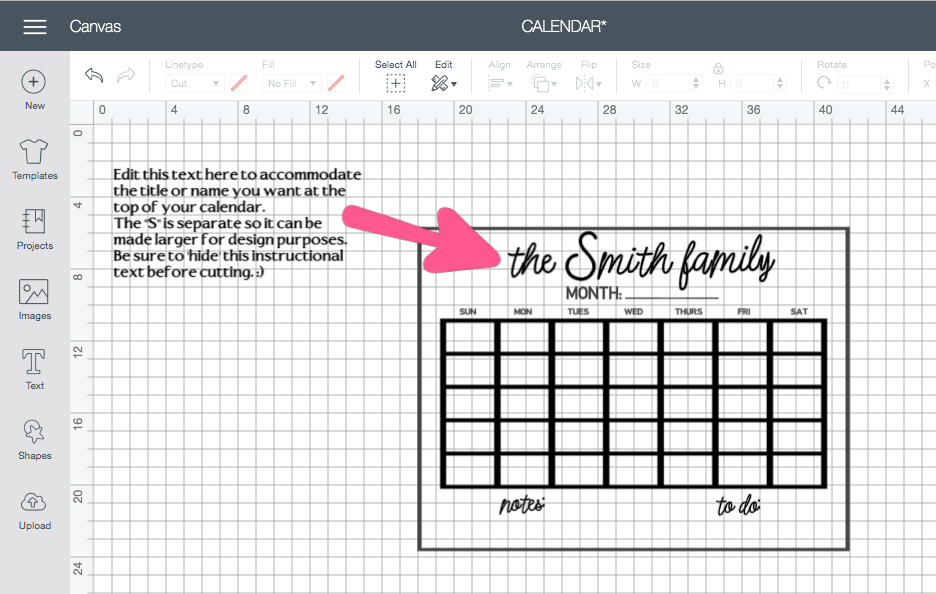
Smartly-behaved love in my bag, I separated the first letter of the closing name to murder it bigger.
Make certain to Weld cursive lettering together, and Set aside bag ingredients together that that you can well perchance be attempting to bear to slash support together.
Which you can furthermore swap around text kinds, font, sizing, etc.
I hope you chanced on this tutorial handy – in the occasion you murder this for your house, I’d appreciate to be taught about it or thought it in either the comments under or be at liberty to imprint me on Instagram so I will thought your advent! I love serving to others craft and create a residence they appreciate.
What craft are you engaged on recently? Share with me in the comments under!
Easy DIY Acrylic Calendar For $25 With The Cricut Come all over Air 2


Yorumlar
Yorum Gönder