How To Calibrate Your Cricut Machine – A Detailed Screenshot Tutorial
h
Need to calibrate your Cricut? Educate this straightforward tutorial, with straightforward-to-clarify screenshots and directions!
Hello, lovelies!
I do know what you’re pondering – one other crafting submit?
No longer too prolonged ago, I’ve been loving discovering contemporary ways to make exercise of my Cricut Explore Air 2 to lend a hand put together our home and produce fun, functional DIYs that I will fragment with you all!
I’ve even integrated some of my popular crafting posts with you all at the bottom of this submit.
Esteem simply final week, I created a DIY Acrylic Calendar because of I became as soon as *this shutto attempting to get one for $110 on-line when it dawned on me that I CAN TOTALLY MAKE THAT.
And I did, for simply $25.
It became as soon as extra fun creating it myself, and I acquired to essentially customize it to match our household’s wants.
But now that I’ve owned my Cricut for a twelve months, I discovered myself desiring to calibrate it.
It’s possible you’ll per chance well typically elaborate it’s a long way well-known to calibrate your machine when the cuts are OFF, which became as soon as completely the case in indubitably one of potentially the most contemporary projects I’ve been engaged on that I’ll be sharing with you next week.
Calibrating your Cricut is a licensed a part of owning your machine and desires to be performed as wanted, or lawful before the utilization of the Print Then Lower feature.
Your machine, if it’s contemporary, is already pre-calibrated while you identify on it.
But, for regardless of motive, it is advisable to per chance well well per chance also get yourself desiring to calibrate your machine after…
- per chance you’ve tried out a contemporary Cricut Hack that you shouldn’t have tried with your machine – *aspect-eyes, cough*
- The utilization of Print Then Lower
- Closely the utilization of your Cricut day-in and day-out, especially at the same time as you hang your hang industrial that requires hundreds chopping with your machine
So on this tutorial, I’ll be exhibiting you strategies to recalibrate your Cricut Explore Air 2 or Maker, with priceless screenshots and a few DON’Ts from a seasoned Cricuter…
How To Re-Calibrate Your Cricut
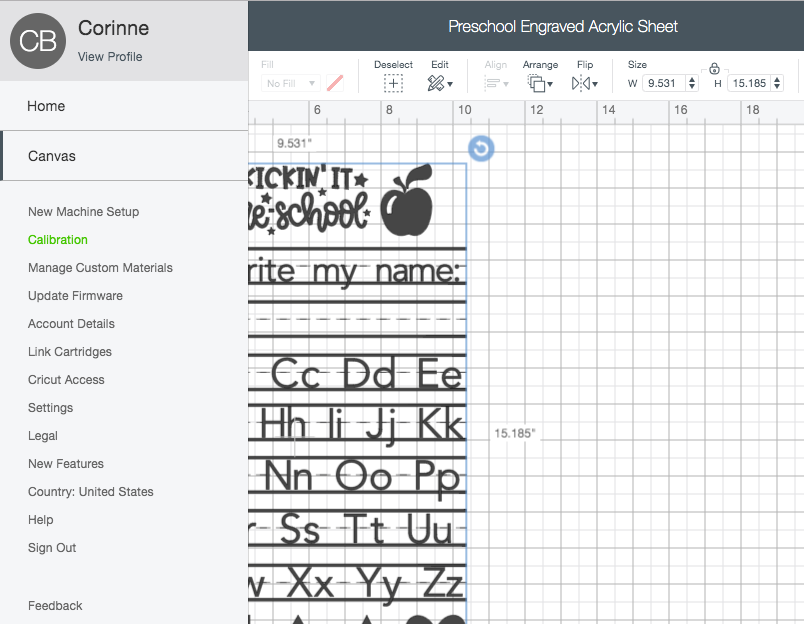
For your Canvas, decide the icon that appears to be like devour three horizontal traces at the tip left of the conceal to enhance your Cricut menu, and identify on ‘Calibration‘.
It needs to be the 2nd line of textual verbalize material beneath ‘Canvas‘ (gaze it in inexperienced beneath to the left of the conceal).
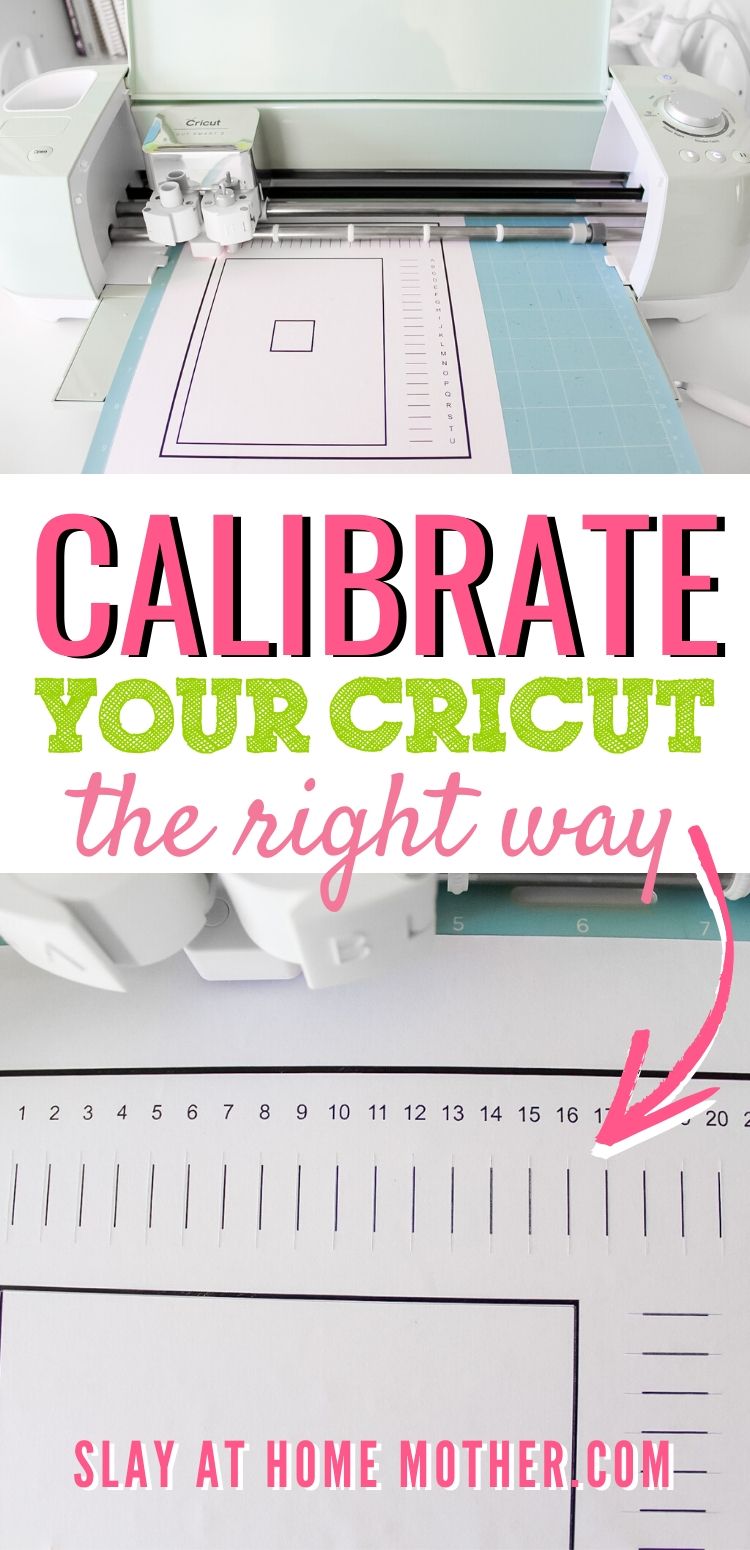
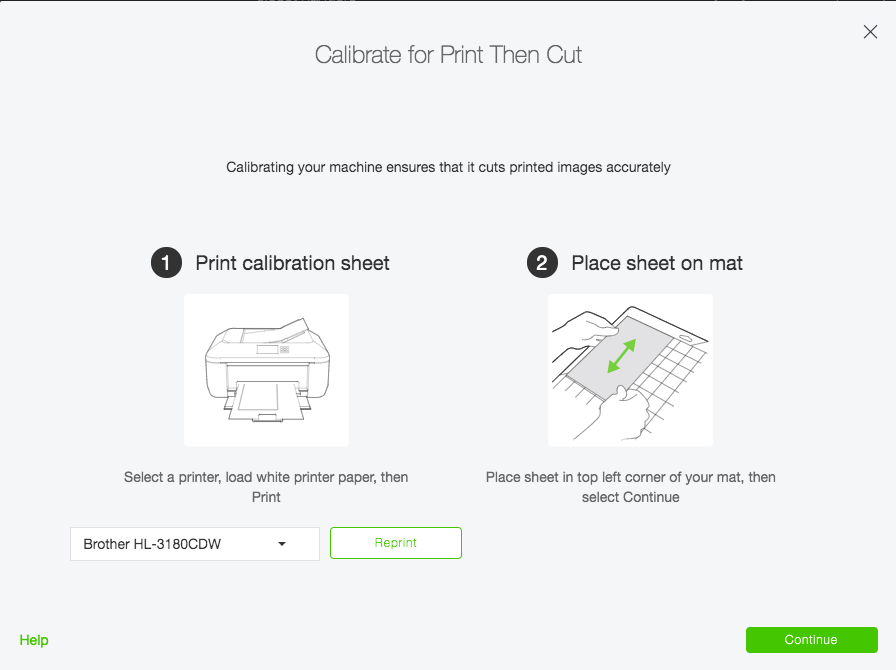
First, you’ll wish to Print the calibration sheet with your printer, after which dwelling the sheet with the squares and traces dealing with UP on a LightGrip mat within the greater left nook of the mat.
Press the inexperienced ‘Proceed‘ button and cargo the mat to your Cricut machine.
Your Cricut will originate chopping on the sheet of paper.
This can originate with the center sq. and circulate to the traces at the tip and lawful of the paper.
Among the cuts shall be VERY OFF and likewise it is advisable to per chance well well per chance also very well be questioning what the heck your machine is doing!
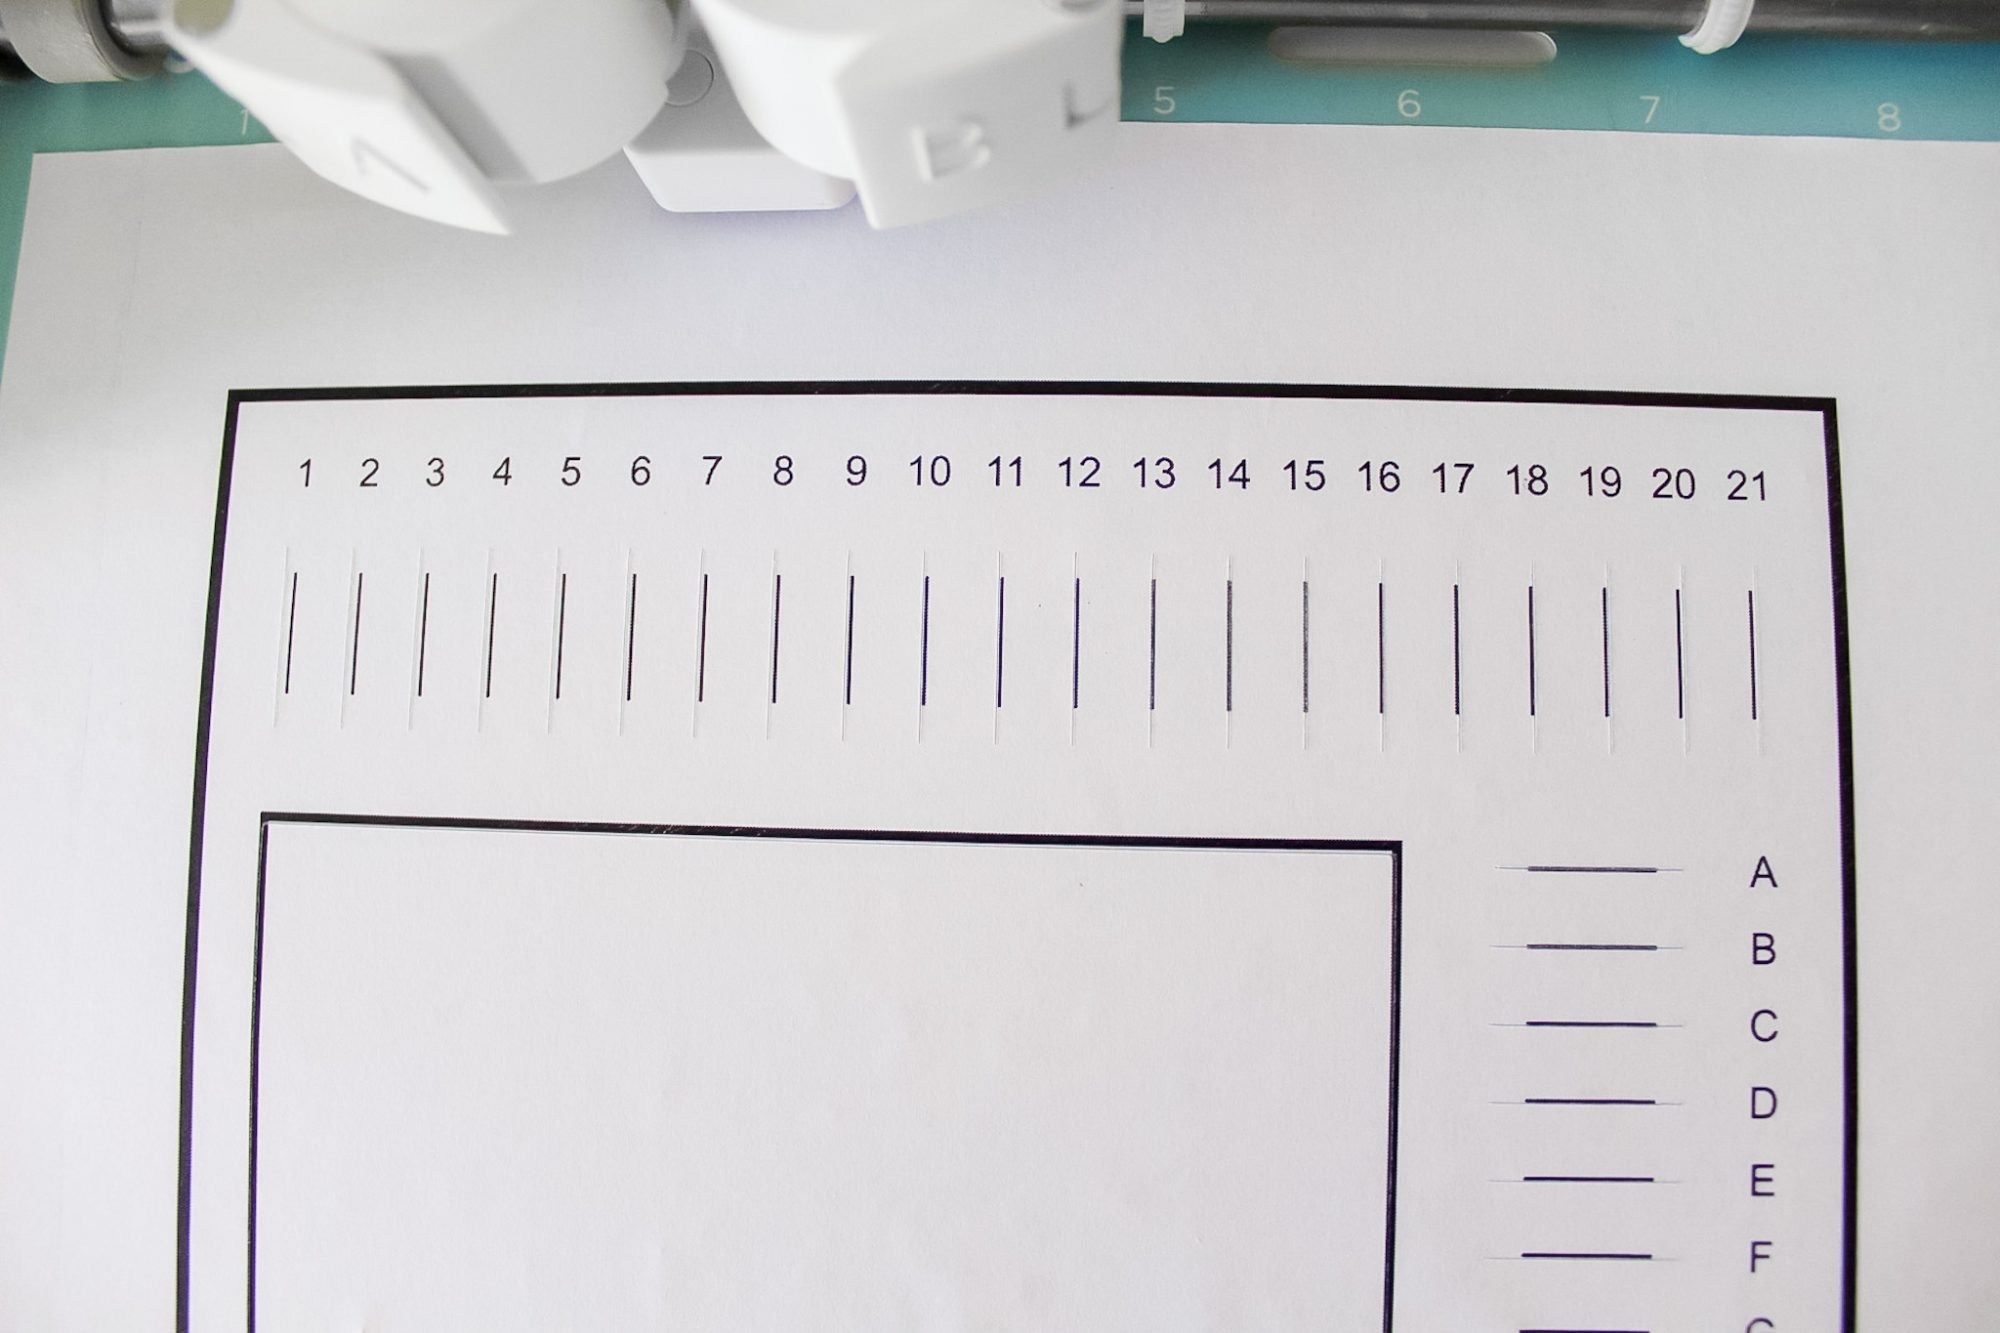
But as soon because it’s performed, Originate Situation will quiz you to peek the traces at each the tip and along the lawful aspect to establish which lower became as soon as potentially the most exact.
Remove the amount and letter that hits the center of the line BEST, and click on the inexperienced ‘Proceed‘ button.
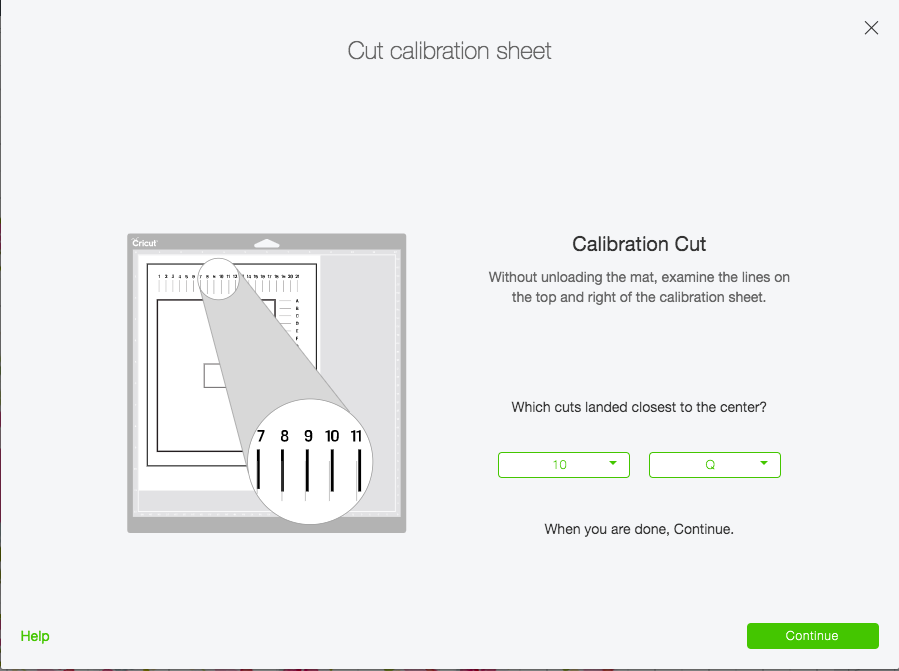
Your Cricut will then live calibrating by chopping out the larger sq. within the center of the fragment of paper.
When it’s performed chopping, Originate Situation will quiz you to unload the mat to peek the lower – DON’T DO THIS!!!
Grab it from me, as quickly as you unload the mat, the window will shut and Originate Situation will execute the calibration course of and likewise you’ll wish to originate over.
Survey the lower for accuracy with the mat soundless loaded, after which press ‘Attain‘.
It’s possible you’ll per chance well then unload your mat and proceed with crafting as your machine is now calibrated!
Here are some suited projects to lift a take a look at out with your Cricut:
- DIY Front Door Spherical Welcome Worth With The Cricut Explore Air 2
- 5 Systems To Safe Your Dwelling Organized With Cricut Joy
- DIY Personalized Toddler Shoes With The EasyPress Mini
- How To Safe A Monogram In Originate Situation ($5 DIY Keychains With Monograms)
- What Is Infusible Ink (Easy DIY Infusible Ink Coasters Tutorial)
- Print Then Lower Cricut Tutorial: Easy DIY Stickers for About $0.12!
- How To Safe Vinyl On A Zigzag Surface (Easy DIY Adorns For Christmas)
- 5 Things I Bask in About My Cricut Explore Air 2 + DIY Dwelling Worth With Interchangeable Pieces


Yorumlar
Yorum Gönder